Showing posts with label glaze. Show all posts

Wednesday, April 18, 2012

Peanut Butter Chocolate - Chip Pound Cake with Peanut Butter Glaze


Pay attention folks, this is one recipe you should NOT miss!  I expected it to be delicious, but WOW, it's amazing!!  It's also totally not good for you, but you can pretend I didn't write that.

Okay, so I pinned this on Pinterest ages ago from Recipe Girl and I finally got around to making it.  I feel like I was in a cupcake rut and wanted to try something different.  I picked the right recipe with this one!!

I'm just going to get to it so you can start baking this ASAP, but it's going to be hard for me because I sent it all to work with my Husband so I wouldn't eat any more.  Yeah, guess what I've been craving all day!!

Peanut Butter - Chocolate Chip Pound Cake with Peanut Butter Glaze
Recipe by Recipe Girl

For the Cake:
3 cups all-purpose flour
1 teaspoon baking powder
1/2 teaspoon salt
1 cup creamy peanut butter (Recipe Girl advises against natural)
1/2 cup butter, at room temperature
3 cups granulated white sugar
6 large eggs
2 teaspoons vanilla extract
1 1/2 cups milk chocolate chips


For the Glaze:
1 1/2 cups confectioners sugar
1/4 cup milk
1/4 cup creamy peanut butter
1/2 teaspoon vanilla extract
1/4 cup milk chocolate chips for garnish


To begin, preheat oven to 325 degrees.  Spray a tube pan thoroughly with non-stick cooking spray, set aside.  Next, whisk together flour, baking powder and salt in a medium bowl.  Set aside.  In a large bowl, using an electric mixer, beat together peanut butter and butter until creamy.  Add granulated sugar and beat for an additional 5 minutes.


Add eggs and vanilla, beat until combined.  The batter will be thin.


Add the flour in increments (I did 4) to the batter.  It will thicken very quickly:


Pour the batter into the greased tube pan and tap it against the counter to make sure any air bubbles will pop.


Bake for 1 hour and 20 minutes.  Test with a wooden skewer to make sure it is fully baked (stick skewer into middle of the cake and if it comes out clean the cake is done.).  Remove cake from oven and let it cool in the pan for 20 minutes.  After removing the cake from the pan, let it cool completely before adding the glaze.


To make the glaze, whisk together the confectioner's sugar, peanut butter, milk and vanila extract until its combined.  The glaze needs to be thin enough to drizzle on the cake, so if it's too thick add a bit of milk a little at a time until desired consistency is reached.  Once the cake is cooled and glaze is whisked up, drizzle!  Garnish with additional chocolate chips.


I totally want this cake for dinner.  I'm so glad I sent it away, but not-so-secretly wish I saved myself a slice!  Anyway, a word of caution when making this cake.  I had to make it twice because the first one did not bake through all the way.  I removed the first attempt from the pan and left for an appointment while it finished cooling.  I noticed, when I returned, that it sank.  I ignored it and added the glaze and after it set I cut a nice slice for myself.  That's when I noticed the ring of uncooked dough all around my cake:


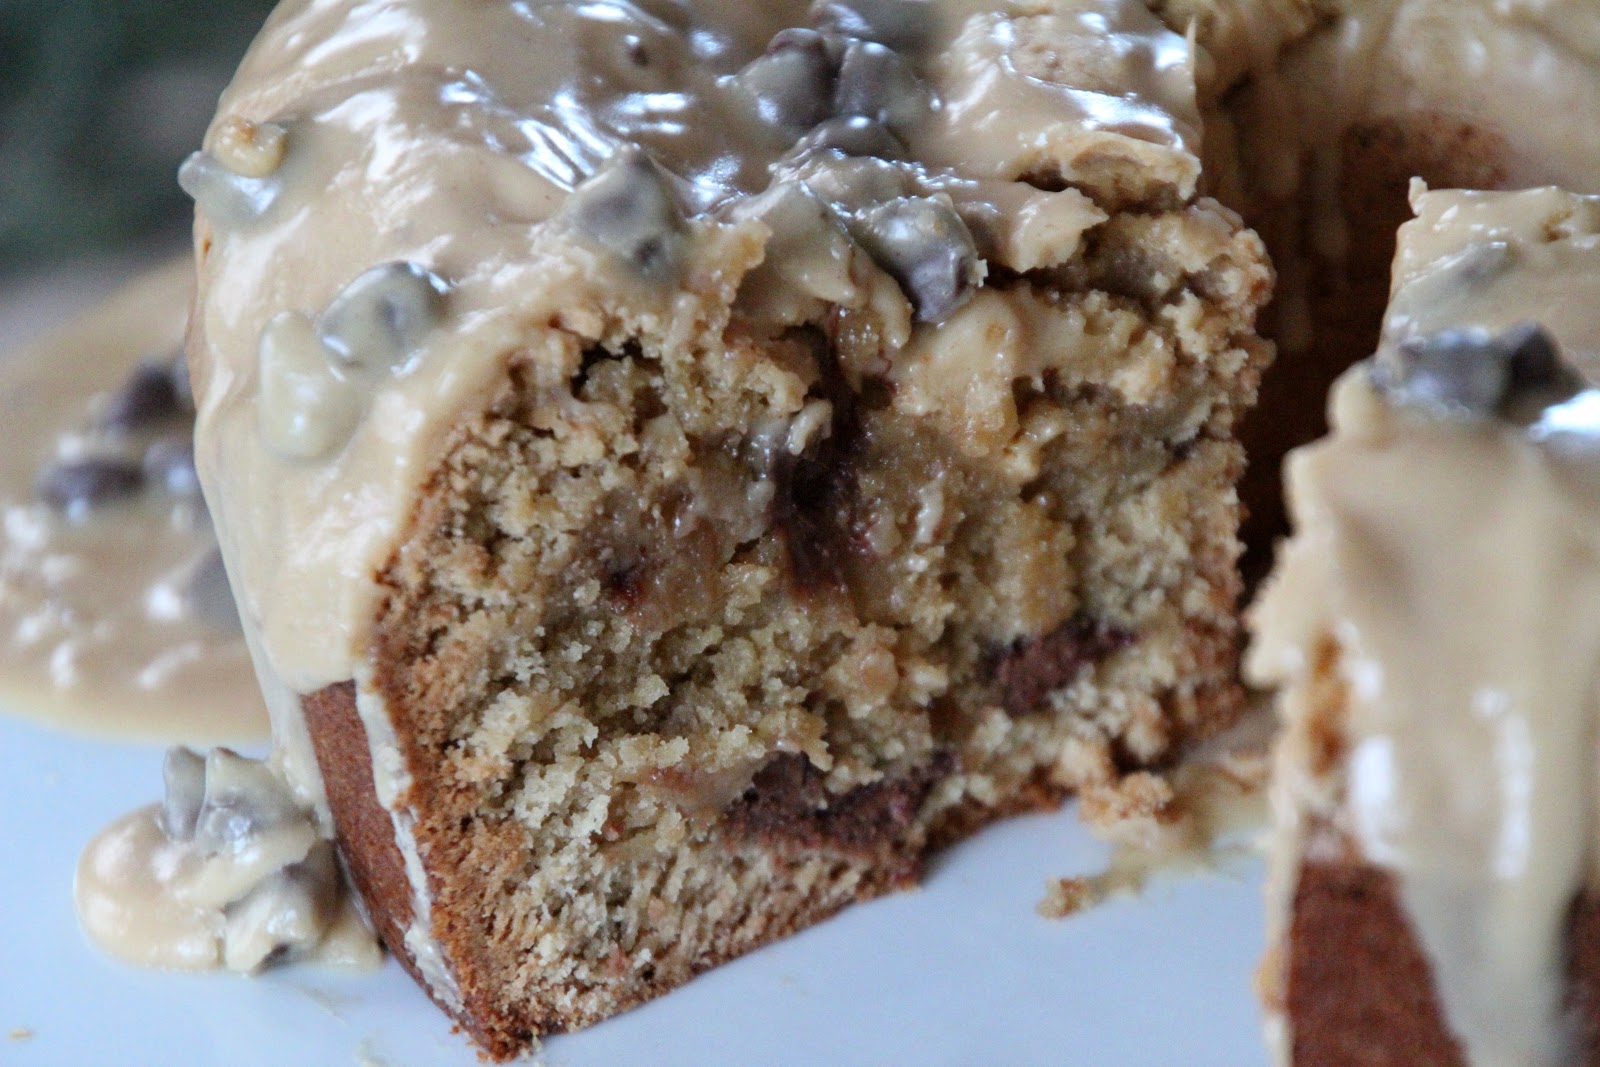
I used toothpick to check the cake and it came out clean, but I believe a toothpick is not long enough to give an accurate result.  The second attempt I used a skewer and after 1 hour 20 minutes it was not done, so I baked it for an additional 15 minutes and it was perfectly done.

But when I cut into the first cake, I'm not going to lie, I was devastated.  I wanted to eat a slice so badly I did the only thing I could do...I made it again.  So.  Worth.  It.

Now, if you like super dense, peanut buttery, chocolate accented, glazey goodness this cake is for you and I guarantee you will love it!!

Wednesday, February 22, 2012

Amazing Apple Fritters


OHHHHH...these are so good I wish I could eat them everyday.  Actually, they are so easy to make it is totally feasible to bake some up everyday.  It just wouldn't be the most healthy choice one could make.  ;)  Ah, but who am I to judge?!

I'd been very excited about about baked donuts and made a several varieties, including my personal favorite - Apple Cider Donuts.  Of course, baking rather than frying is much better for you, and donut pans make it easy to whip up a batch.  However, sometimes fried is the way to go and it just has to be done!  This is the case with Apple Fritters; they are just one of those if-it's-not-broke-don't-fix-it type of treats.  So, I sucked it up and got out the oil, ready to give these a try!


Homemade Apple Fritters
Recipe very slightly adapted from Seemingly Greek

1 heaping cup of all-purpose flour
1/3 cup sugar
1 teaspoon baking powder
dash of salt
1-2 teaspoons cinnamon (depending on how much you would like)
1/4 teaspoon nutmeg
1/2 teaspoon pure vanilla extract
1 tablespoon butter, melted
1 egg
1/3 cup milk
1 - 1 1/2 cups of your favorite apple, chopped about the size of a peanut
canola oil for frying
apple cider and confectioner's sugar for glaze
  • Chop apples into small pieces

  • Mix dry ingredients together.
  • Slowly add the wet ingredients MINUS apple, until combined, taking care not to overbeat.
  • Gently fold in apples.  Batter should be consistency of a light cake mix.

  • Heat oil to about 360 - 375 degrees.  Use a skillet or pan that will allow dough to be completely submerged while frying.  (To test oil, drop a bit of batter into oil and if it rises to the top the oil is ready.)
  • Use a soup spoon to place 4-5 scoops of dough into oil.  Be careful not to overcrowd.
  • Watch for underside to turn golden brown, and then carefully flip over, continuing to fry until done (about 35 seconds per side for golf ball sized fritter).
  • Test one fritter to ensure they are frying all the way through. Adjust the cooking time if necessary.
  • Use tongs
Okay, this is a really simple process.  Honestly, it is.  You just need to have a little knowledge of frying before you begin.  Which, I didn't.  So, I learned the hard way (and after the fact of my first batch of fritters!).  Without arming myself with some simple information, I ended up with this:


Every single one of them burned.  So, I will share a few tips to keep in mind so you don't burn yours, as well.  

  • First, use canola oil.  I used vegetable oil.  Canola oil is ideal because it has a higher smoke point. This means the oil can reach higher temperatures before smoking up your kitchen (or, in my case, your whole house.  I smelled like a fritter for days...).
  • If you are not using a deep fryer, make sure you use a stovetop pan that will allow the oil level to be high enough the fritters will be completely submerged.  If not, the fritters will rest on the bottom of the pan and scald.  Like the picture above.  Ugh.
  • The 35 second frying suggestion is just that - a suggestion.  I found mine were not cooked all the way through.  Definitely test one in the first batch so you know you are on the right track.
  • It's best to use a deep fry/wok strainer to remove fritters.  I didn't have one at the time, so I used metal tongs.  Just be sure to use something that can stand up to the heat.
  • Place fried fritters on a plate covered in paper towels, which will absorb excess oil.
Following those guidelines, I made a new batch.  This time, perfection!  A nice golden brown nugget filled with apples and cinnamon with a slight crunch.  I could have stopped there and enjoyed them, but why not  kick it up a notch and glaze the fritters?  This is the easiest part:

Apple Fritter Glaze

2 cups confectioner's sugar
1/4 cup apple cider

In a medium sized bowl, add cider to sugar.  Whisk until combined and glaze is smooth.  Use tongs or a spoon to coat fritter with the glaze.  Immediately set on a baking rack with waxed paper underneath to catch drippings.  If you don't have apple cider you can substitute water or milk.


Mmmmmm.....just typing this I'm restraining myself from making a batch right now they were so good!  I love them and can't wait for house guests to visit so I can make fritters for them.  They will be great for breakfast.  I cannot vouch for how well they keep after a day, as they did not last that long.  My taste testers loved them as much as I did, but we had to sample several to be certain.  Next thing we knew the plate was empty.  Wonder how that happened?!

Sunday, October 30, 2011

Chocolatey Halloween Baked Donuts


I found THE most amazing chocolate donut recipe.  I will look no further, this one is it!  I love when a recipe is just right on the first try.  Another great thing is that it yields 6 donuts, so if you have the urge to make them you will not end up with an army of donuts that need eating!!

So, here's the recipe:

Chocolate Baked Donuts
(adapted from Handle the Heat)

Note : It may seem strange to add nutmeg to a chocolate recipe, but nutmeg is the key to a recognizable doughnut flavor. It’s fine to leave it out, but your doughnuts may taste a bit more like chocolate cupcakes.

1 cup of flour
2 tablespoons Dutch cocoa powder
1 teaspoon baking powder
1/4 teaspoon baking soda
2/3 cup sugar
1/2 teaspoon nutmeg
1/2 teaspoon fine grain salt
2 tablespoons unsalted butter
1/2 cup milk (I used 2%)
1/4 cup plain yogurt
1 teaspoon vanilla extract
1 large egg

Preheat oven to 400 degrees and lightly grease donut pan (or muffin tin).  Sift together flour, cocoa powder, baking powder and baking soda, then whisk in sugar, nutmeg and salt.  Using your fingers, add the butter working it into the dry ingredients until course crumbles are formed.  In a separate bowl, whisk together the milk, yogurt and egg.  Add the dry ingredients and stir until they are just combined.


You do not want to over mix the donuts or they will bake up dense and heavy, rather than light and fluffy.  To place donut batter into the donut pan cavities, pour the batter into a ziploc bag, cutting off one corner.  You can then squeeze the batter into the pan with minimal mess.  Fill each cavity about 1/2 to 3/4 full.


If you overfill the pan the donuts will bake up without a hole in the middle.  Bake for 8-10 minutes until the donuts spring back lightly when touched.  Place on a rack to cool slightly before adding the glaze.

Chocolate Glaze

1/4 Cup unsalted butter
4 tablespoons whole milk, warmed (I used 2%)
1/2 tablespoon light corn syrup
1 teaspoon vanilla extract
2 ounces bittersweet chocolate, chopped
1 cup confectioners sugar, sifted

Combine butter, milk, corn syrup and vanilla in a medium sauce pan over medium heat until butter is melted.  Decrease heat, blend in  chocolate, whisking until it's melted.  Turn off the heat and add powdered sugar, whisking until smooth.  Place the mixture over a bowl of hot water and dip immediately into the glaze mixture.  Allow glaze to set 30 minutes before serving.


I wanted to "Halloween-up" my donuts, so added black gel food dye into the donut batter to darken it up a bit.  I also added black dye to the chocolate glaze until it was a nice, deep, black color.  I tried dipping the first two donuts in the glaze, but they broke apart and were a mess.  For the remaining 4 I place a sheet of waxed paper underneath the cooling rack and spooned on the glaze.  This worked perfectly.  When I finished, I removed the waxed paper and was left with no mess at all.


Once glazed, I sprinkled on some orange and white ice cream sprinkles I had in my pantry.  They look delicious and taste even better!  What a great way to start off Halloween day by baking these for breakfast with your ghouls and goblins.  :)