Showing posts with label sugar. Show all posts

Wednesday, March 14, 2012

Shortbread Cookies - Raspberry and Almond


So, yes, I am on a bit of a shortbread cookie kick right now.  I'm like this with most things in life...can't get enough of something and then move on to the next obsession!  Meals, TV shows, songs, outfits, and now shortbread cookies.

This time, I wanted to add different extracts to my favorite shortbread recipe; the one I used for the Cherry Hearts Dipped in Chocolate.  I love it as a buttery shortbread, but I also think it's a good base for adding different flavors to change things up.  The Peanut Butter with Chocolate Chip Shortbread Cookies and Dutch Chocolate Shortbread with Peanut Butter Chips Cookies recipes are quite different from this one.  Those, as I wrote, are melt-in-your-mouth soft, crumbly cookies.  This recipe has an initial "crunch" at first bite with a soft chewy center.  I really love that combination.

I was making these cookies as a "Thank You", which was a great opportunity to use my new cutter set from Williams-Sonoma.  There are three basic shapes and removable sayings and letters to spell out whatever you wish.  This was my first time using them:


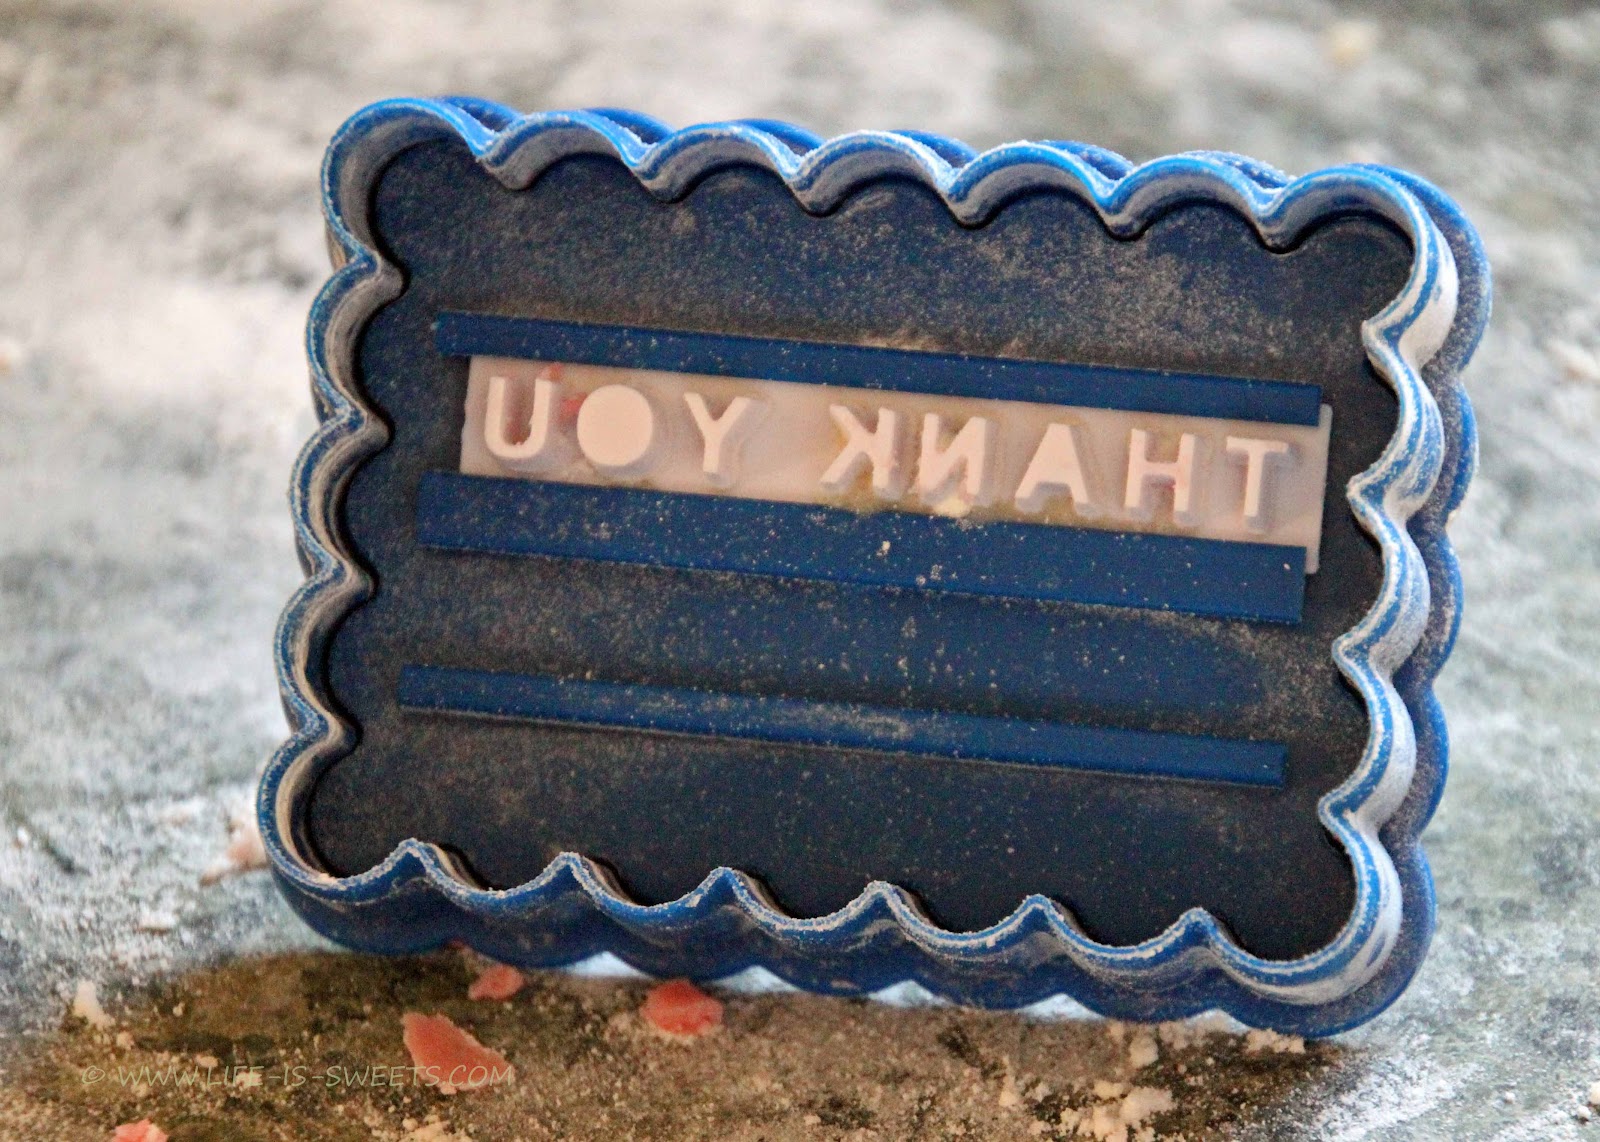
As I was going through lots of shortbread cookie recipes trying to find what I wanted to use, I read many user comments and one thing really stuck out to me.  People seem to confuse shortbread cookies with cut-out cookie recipes.  There seems to be an expectation that using a cookie cutter with shortbread will produce the same result as sugar cookies.  This is not at all true.  I was not sure what to expect using these cutters, especially with the words imprinted, I was completely experimenting.  Shortbread cookies are very crumbly and do not hold their shape as precisely when baking as cut-outs.  They are a dryer tasting cookie, delicious in their own way, but different.  Knowing this ahead of time will help manage expectations of what you are trying to achieve.

Shortbread Cookies
Adapted slightly from Ina Garten

3/4 pound unsalted butter at room temperature
1 cup sugar, plus extra for sprinkling
1 teaspoon pure vanilla extract
1 teaspoon raspberry extract
3 1/2 cups all-purpose flour
1/4 teaspoon salt
A few drops red food coloring (to desired hue)
6 to 7 ounces very good semisweet chocolate, finely chopped


(To make the almond version, substitute 1 teaspoon almond extract for the raspberry extract and omit the food coloring)

Preheat oven to 350 degrees F

In the bowl of an electric mixer fitted with the paddle attachment, mix together butter and one cup of sugar until they are just combined.  Add the vanilla, raspberry extract and food coloring..  In a medium bowl, sift together the flour and salt and add them to the butter/sugar mixture.  Mix on low speed until the dough starts to come together.  Dump onto a surface dusted with flour and shape into a disk.  Wrap in plastic and chill for 30 minutes.

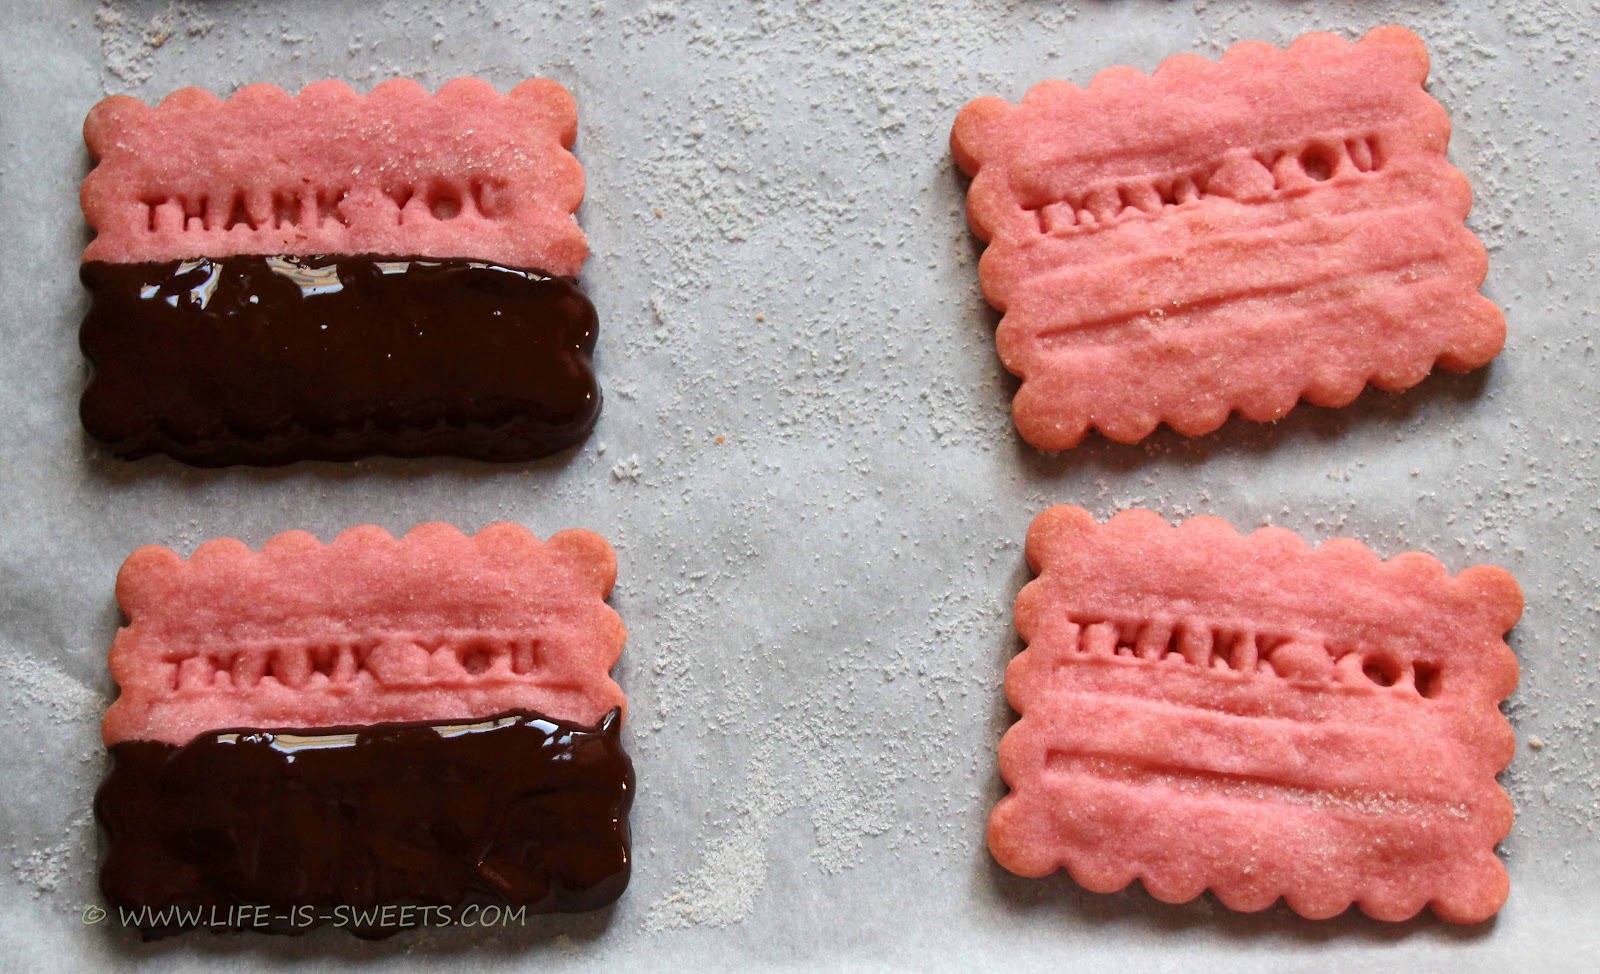
Roll the dough 1/2 inch thick and cut with chosen cutter.  Place cookies on an ungreased cookie sheet and sprinkle with sugar.  


Bake 20-25 minutes or until edges begin to brown slightly.  DO NOT OVERBAKE!!!  Allow to cool to room temperature.


When the cookies are cooled, place them on a cookie sheet lined with parchment paper.  Put 3 ounces of chocolate in a glass bowl and microwave on high for 30 seconds.  Stir with a wooden spoon.  Continue to head and stir in 30 second intervals until the chocolate is just melted.  Add the remaining chocolate and allow to sit at room temperature , stirring often, until it is completely smooth.  Stir vigorously until the chocolate is cooled and smooth and slightly cooled.  Stirring makes it glossier.


Drizzle each cookie half way with enough chocolate to coat it.


First, though these may not be the pretties cookies, they taste GOOD!  I love this recipe!!  You may note what I was talking about with the shape holding up while baking.  The letters are askew and uneven.  Fortunately, this does not affect the taste!  For this cookie experiment, the flavor was a success, the cut-outs not so much.  Next time, I will use a simple cutter with no lettering.

This will conclude my foray into shortbread cookies!  I have several orders to fill in the next few days that need my attention.  There will be cakepops, brownies, bailey's cupcakes, green velvet cupcakes, and Minnie Mouse cupcakes.  Yay!


Friday, February 10, 2012

"Conversation Hearts" Cherry Pies with Homemade Cherry Pie Filling


I've absolutely loved the adorable individual heart cherry pies I've been seeing on blogs and Pinterest.  I knew I wanted to give baking them a try and was excited when I remembered the conversation heart stencils I bought a few months ago.  How cute would conversation heart cherry pies be?  Pretty cute, as it turns out!

I began by making cherry pie filling.  I feel awful about this, but it was my first time making pie filling outside of  pie and I'm not 100% sure of the measurements I used because I kept adding things - a bit more cornstarch, a little more sugar, a few more cherries.  I can tell you how I started and how you can begin and tweak things to reach the consistency you want.  I learned an important lesson along the way, too, about cornstarch.  Did you know that it will NOT dissolve in hot liquid, instead it will clump in little bits?  You did?  Most of my friends knew that, too.  Me?  I learned the hard way.  Here's what happened:

I started with 2 - 24oz. jars of pitted sour cherries.  I strained them reserving the juice, setting the cherries aside.  I measured a cup and a half of the juice and poured it into a small sauce pan along with 1 cup of sugar.  After bringing it to a boil, I added 2 tablespoons of cornstarch.  It thickened nicely, but I could not get rid of the cornstarch clumps.  I dumped it out and started again.  Cherry juice, sugar, and this time I heated up a splash of water in the microwave adding the cornstarch to it.  I waited for it to dissolve in the hot water.  Nope.  Clumps.  I did not add it to the juice and sugar mixture.  I just stirred and thought about what I could do.  I did not have pectin and didn't want to go to the store.  I wanted to come to an understanding about cornstarch.  I'm not sure why I didn't just Google the answer, but eventually I had the bright idea to try and dissolve the cornstarch in room temperature water.  VOILA!  Completely dissolved.

So, here's where we are at (a.k.a. How to begin the process of making Cherry Pie Filling): 
1 1/2 cups of sour cherry juice
1 cup cup of sugar
2 teaspoons of vanilla extract
2 tablespoons cornstarch dissolved in room temperature water

Bring to a boil and let thicken.  Add 1 1/2 cups of cherries.  Let simmer until thick enough to spoon onto pie crust without making a mess.  Real scientific, huh?

I tasted the filling and found it was still too sour.  So added more sugar.  1/3 cup.  And then a little more until I thought it was sweet enough.  However, this made the filling much runnier.  So, I had to add more cornstarch to thicken it, without using too much water to dissolve it so it wouldn't make it thinner while trying to thicken it.  Are you following all of this?  This is the point where I lost the measurements since I was adding amounts at random.  So, I suggest one of two things:

1. Relax and experiment, you're only making pie filling and not  performing surgery.
2.  Just buy some canned stuff.

Either way, the pies will be cute and delicious!  Here's my finished filling (verys tasty, too!):


Conversation Cherry Pie Hearts

1 can of cherry (or other) pie filling (or homemade filling)
pie crust dough, homemade or store bought
edible color dust in pink and red
powdered sugar to dust pies, if desired

To assemble the pies, either make your own favorite crust or buy pre-made ones (I bought crust.  I admit it).  Roll out the dough and cut out heart shapes.  You will need two hearts for each pie.  Place them on a cookie sheet lined with parchment paper.  On the top heart, use a small craft paintbrush to brush edible color dust over a stencil placed on top of the dough., You can see this technique by clicking here.  You can buy the color dust at craft stores such as Michael's or online.


Gently lift the stencil off of the dough:


Next, place a spoonful or so of filling on the bottom heart:


After running your fingertips through water, trace around the edge of the heart with filling on it, making sure it's wet enough to create a seal after placing the top heart over it.  Press firmly around the perimeter of the heart:


To complete the process, use a fork and pressing the tines around the heart.  Lastly, use a toothpick to poke a few holes in the pie crust.


Now they are ready for baking!  I followed the instructions, preheating my oven to 425 for baking for 15 minutes, but it didn't work out:


So, I tried again baking for less time (10 minutes) and keeping an eye on them, ready to remove the pies from the oven at the first sign of light browning:


Yay!!  Exactly everything I hoped for *sigh*.  I don't mean to be dramatic, but it was a long morning of trial and error for something I thought should be pretty easy.  Don't let me scare you away from trying these.  They are easy.  Really!  My husband loved them and I did, too.  :)  


Sprinkling some powdered sugar on them makes them even sweeter, though I haven't found a way to do it in an aesthetically pleasing way with the stenciling.  I'll work on it.  In the meantime, Valentine's Day is next week and these are a pretty quick and delicious way to let someone know you love them!


I have shared this recipe with:


Sunday, January 1, 2012

My All Time Favorite - Peanut Butter Blossoms!


If there's one cookie I have no self control over, it's the Peanut Butter Blossom.  I think this cookie is absolute perfection.  Chocolate and peanut butter goodness.  And they're cute, too!

Since I've started this blog, the most popular post by far has been my pink peanut butter zebra stripe cookie.  It's just a variation on a theme; using pink dye for the dough and a Hershey Hug rather than a Kiss, and it has taken off like wildfire!  I'd like to give some love to the inspiration, the irreplaceable, the original Peanut Butter Blossom.

For me, this cookie represents the Thanksgiving through New Year's holiday season.  It's not a celebration if these are not present on the dessert table, so I made some.  More than some, actually.  I made a LOT.  Here's how I did it:


Peanut Butter Cookies (adapted from Betty Crocker's Cookbook)

1/2 cup granulated sugar
1/2 cup brown sugar
1/2 cup peanut butter (I prefer Reese's Peanut Butter)
1/4 cup shortening (I prefer Crisco baking sticks, butter flavor)
1/4 cup butter, softened
2 tablespoons milk
1 egg
1 1/4 cups all purpose flour
3/4 teaspoon baking soda
1/2 teaspoon baking powder

Cream together the butter, shortening, and peanut butter. Mix in sugars, egg and milk. Add the remaining ingredients. Preheat oven to 375 degrees. Roll the dough into 1 1/2 - 2 inch balls.  Dredge the balls through sugar and place on an ungreased cookie sheet at least three inches apart. 


Bake between 9-10 minutes.  While they are baking, unwrap enough Hershey Kiss's to place on top of each cookie.


After removing cookies from the oven, push a Hershey Kiss into the center of each one.  Let cookies cool several minutes before removing them from cookie sheet.


 Be careful not to touch the kiss for at least an hour after placing them on the cookie.  It will keep it's shape, but it will also be quite soft and easy to squish.  After a few hours they will be perfectly set and you can stack them in an airtight container for storage.  If they last that long!


Wednesday, November 23, 2011

Chocolate Chip and Cream Cheese Cookie Dip


Okay, this is delicious.  Even for someone (me) who is not terribly fond of cheesecake, this dip is fantastic.  And, even BETTER, it's ridiculously quick and easy to make on short notice.  Your guests will love it.  Just be sure to make enough, it disappears pretty quickly!

Chocolate Chip and Cream Cheese Cookie Dip

1 package (8 ounces) Cream Cheese, softened
1/2 cup (one stick) butter, softened
1/2 teaspoon vanilla extract
3/4 cup confectioner's sugar
2 tablespoons brown sugar
3/4 cup miniature chocolate chips

In a large bowl beat together cream cheese, butter and vanilla extract until fluffy.  If you are not using a hand mixer be sure to beat until completely combined.  Add the sugars in small increments, stirring well with each addition.  Next, add the chocolate chips and mix until well combined.  Refrigerate at least two hours and serve with graham crackers.

See?  Easy!  Except that I don't like graham crackers, and I'm sure I'm not alone.  I decided to make chocolate cookie sticks to use for dipping.  I mixed up a batch of Chocolate Cut-out Cookies.  They are not too sweet and complement the dip perfectly.  After refrigerating for 20 minutes, I began to cut the sticks using a square cookie cutter.  


Once the square shapes were cut, I used the same square cutter to make sticks.  I decided I didn't mind if the sticks were evenly cut or all different widths, so I did not focus on perfectly shaping them.


I baked them as directed, but I think they could have used another minute or two.  They were a bit on the soft side, so not all of them were sturdy enough to actually dip.  Next time, I will make them thicker and bake them longer.


This is a phenomenal dessert perfect for parties, showers, holiday get-togethers, book club meetings, or just because!  You can also use Nilla Wafers, Sugar Cookies, Tea Biscuits, or any type of cookie you wish.  Enjoy!!


Sunday, November 13, 2011

Baked Apple Cider Donuts


I've been on a baked donut kick since I bought my donut pan.  I didn't think anything would be as tasty as the chocolate donuts I made, but I was wrong.  These apple cider baked donuts blew me away with their flavor and donut deliciousness.  I don't make this claim lightly, as I absolutely *LOVE* the fried version.  So much so I almost didn't try to make these since there was no way I could figure it would result in anything but disappointment.  Wrong.  I *LOVE* this baked version!

Making donuts is so easy I'm not sure I will buy fried ones anymore.  Of course, there are a few exceptions.  Whenever I make a trip home to Buffalo nothing can stop me from getting a Tim Horton's peanut donut.  It's a mystery to me why you can only find peanut donuts in Buffalo.  They. Are. The. Best.  I suppose it's better that they remain a rare, special treat for me.  And then there's the blueberry cake donut.  Can't resist them.  I found a recipe for blueberry donuts I will be giving a try.  We'll see how they stack up.  In the meantime, let me share this recipe with you.  I urge you to make them as soon as possible!

Baked Apple Cider Donuts
Recipe adapted from Squirrel Bakes

2 Cups whole-wheat flour
1 1/2 teaspoons baking powder
1 1/2 teaspoons baking soda
1/2 teaspoon salt
2 teaspoons cinnamon
1/2 teaspoon nutmeg
1 egg
2/3 cup packed brown sugar
1/2 cup chopped apple
1/3 cup pure maple syrup
1/3 cup apple cider
1/3 cup plain yogurt
3 tablespoon vegetable oil

Preheat oven to 325 degrees.  Grease two donut pans and set aside.  In a medium bowl whisk together flour, baking powder, baking soda, salt, cinnamon, and nutmeg.  Set aside.  


Chop apple into small pieces or use food processor to puree and set aside


In a large bowl combine egg, brown sugar, apple, maple syrup, apple cider, yogurt and oil.  Mix until well blended.  


In small amounts add in flour mixture and combine until just moistened.  Spoon dough into donut pan about 3/4 full.  Wipe away any dough on the center part of the donut cavity to  ensure a hole bakes in the middle of the finished donuts.


Bake for 15-20 minutes or until lightly browned.  This recipe make a dozen donuts.  They are best when eaten within two days of baking them.

I did not have wheat flour so I used all-purpose four.  This may have made the donuts a bit more absorbent when I glazed and sugared them.  I did some reading on substituting whole wheat for all-purpose flour.  You can do it, but you need to adjust the liquid quantities, which I did not do.  I took my chances and they turned out just fine.  Also, I did not puree the apple.  I liked the idea of chunks of apple throughout the donut, and after tasting them I was happy with my choice.

After reading many recipes for baked cider donuts I could not decide if I wanted to sugar or glaze them.  I decided to do both - half glaze, half sugar.  I mixed up some cinnamon sugar while the donuts were baking.  Also, I mixed up the glaze using confectioners sugar, cider, and a bit of cinnamon.  I did not use exact measurements.  I added enough cider to the confectioners sugar to create a paste like consistency.  I really loved the flavor of this glaze!

Cinnamon Sugar/Apple Cider/Cider Glaze
When the donuts were completely baked, I placed them on a cooling rack with waxed paper underneath to catch the excess sugar and glaze.  To coat the donuts in cinnamon sugar I used a pastry brush to paint liquid cider around the top of the warm donut.  Immediately after applying the cider I used a spoon to sprinkle the sugar on the top of the donut.  I spooned the glaze on top the of the remaining donuts.


Once the donuts were coated with their toppings and still warm, I finished up with the last step.  The tasting. A glass of cold cider. A warm cider donut.  Happiness.


Actually, I misspoke.  The LAST last step was finding a home for the remaining donuts.  Luckily, my husband's office staff are more than happy to take baked goods off of my hands.  I packed them up and (a bit reluctantly) sent them on their way.  

I hope they loved these donuts as much as I did!

Sunday, October 2, 2011

Heshey Kiss "Cutie Pies" and Cherry Pie Poppers

Hershey Kiss "Cutie Pies"


This past week I had quite a few requests to bake for different events.  Since I had actual orders to fill (and they were all items I had baked before so I didn't photograph them), I didn't have a lot of spare time to try new recipes.  On Friday, however, I had a few hours to experiment while waiting for a cake to cool.  Again, not a lot of time available, so it had to be something quick and easy.

I recalled a recipe for Hershey Kiss mini-pies I happened upon awhile ago, which fit the bill.  All that's needed is rolled out pie crust dough (either pre-made or homemade), Hershey Kisses, an egg wash (egg white whisked with a bit of water added), sugar, and some melted chocolate (if desired).  What could be simpler?

I began by unrolling out one of the pie crusts (take the dough out of the refrigerator ahead of time so it's room temperature) onto a floured surface.  Next, I unwrapped some Hershey Kisses and placed them on the dough.  I used a set of graduated circle cookie cutters, but you can just as easily use a knife to cut a circle around the Kiss.


Be sure the circle is large enough to wrap around the Kiss.  At first I cut out a circle that was a bit too small, making it difficult to wrap the dough around the top of the Kiss.  As I continued, I  cut out the circles using the next cutter size up.


To fold the dough over the Kiss bring the top and bottom part of the circle together over the top of the Kiss and seal it by pressing the dough together.  Then, do the same with the sides of the dough folded over the Kiss and sealed tightly.


After you have used up all of the pie crust dough (I re-rolled the scraps and continued making pie crust circles).  Brush some egg wash over the crust and sprinkle with granulated sugar, if desired.  Bake at 350 degrees for 18 minutes.


You can sprinkle confectioners sugar on top for some extra sweetness.  I did not, and after tasting one right out of the oven, I was not impressed.  The Kiss did not melt into gooey chocolate and, in my opinion, there was too much crust.  They weren't terrible, just not quite my taste.  Perhaps with some sugar added to the crust I would have preferred them.


I believed some improvement could be made, however, so I decided to melt a few chocolate wafers and drizzle the chocolate over the mini pies.  I was much happier with them!  Again, they are not overly sweet and chocolatey, but in some instances they can be the perfect thing to serve, such as an afternoon snack with coffee or tea.


I just love the Hershey Kiss shape in the middle when you bite into it.  So cute!!

UPDATE:  I changed my mind.  I tried one today with some tea and I actually loved it!!

Cherry Pie Poppers


I found myself with little more time and one more pie crust to use.  I didn't want to make any more Hershey Kiss mini-pies and I had a can of cherry pastry filling (which, looked essentially to be cherry pie filling with the cherries cut up into bits) in my pantry, so I decided to give cherry pie poppers a try.

I used two different sizes of circle cutters to make the pie crust dough circles - a larger one for the pie shell, and a smaller one to top the pie popper.  As with the Hershey Kiss pie, you can also use a knife to cut circles out.  Continue rolling out and cutting the dough scraps until you've used it all.  With one circle of pie crust I was able to make 12 pie poppers (using a mini-muffin baking pan).


I lined the mini-muffin pan with the crust circles and then spooned the pastry filling into them.


Next, I took the smaller circle of dough to cover the shell and filling.  Pinch the dough together to close the seam between the shell and the cover, just as you would with a full sized pie.


After each pie popper is covered and pinched together, use a knife to slash a line through the top of the pie popper crust:


Brush each pie popper with egg wash:


And bake for 19-20 minutes (or until golden brown) at 350 degrees.


Oh, they looked and SMELLED so delicious!!  I couldn't wait to try one, and they did not disappoint.  Another thing I love about these poppers is the portion control.  For me, two were quite satisfying, rather than eating an entire slice of pie.  This is good for those of us who are self-control challenged.


Obviously, I could use some work on pinching together seams, since these split.  Then again, I like the bit of color peaking through.  If I were wrapping these in treat bags the overflow would be a problem.  I suppose it will be a case-by-case decision!   Overall, I am very happy with them and can't wait for an opportunity to bake them again.

Some improvements for the next time:  I will add more filling to the pie crust shells.  This was my first time making these and I wasn't following a recipe or instructions, just kind of winging it.  I didn't know how much filling a pie popper would hold.  I could have used more.  Also, I think the placing of a bit of butter under the top crust (as I do with full sized cherry pies) will achieve a nice, buttery crust taste.  Lastly, in the future I will not be using canned cherry filling.  I much prefer my homemade sour cherry pie filling and will make that instead.


As for using pre-made pie crust, well, I am intimidated by making it from scratch.  I have been using pre-made pie crusts and that has worked out fine.  Since I've started to experiment with baking processes more, I think it's time to give pie crust a try.  My friend Karla promises me a tutorial, since she is known to be "pie crust Queen."  We'll see how that goes!

I'm excited to make these pie poppers in additional flavors, such as blueberry, pumpkin, chocolate, etc.  I'm so happy pie season is here!!!  Are you?


I have shared this recipe with: