Showing posts with label children. Show all posts

Thursday, January 19, 2012

Rainbow Revue - Cupcakes and Whoopie Pies


When I started this blog 5 months ago one of the first things I attempted was rainbow cupcakes.  I had issues with the icing method I experimented with.  I painted stripes of color on the inside of a pastry bag and then filled it with white icing.  


What I hoped would happen was a colorful blend of icing when I piped the buttercream.  Instead, I had  spots of color running through mostly white icing.  I was not happy and have been wanting to try again.


So, my friend Amy joined me to give it another go.  To make it a bit different and more fun we mixed in neon colored gel dye, rather than the usual red, orange, yellow, etc.  Also, we used four colors instead of six.  This made it easier to prevent overfilling the cupcake liners.  We used the same method for the cupcakes as my original Rainbow Cupcake post, which you can find here.  

There was enough batter to make about three more cupcakes, but Amy had the idea to make Whoopie Pies with the extra.  We used a Whoopie Pie baking pan and she filled each cavity with several colors instead of just one.  They were adorable!


While the baked cakes were cooling, I mixed up a batch of vanilla buttercream.

Vanilla Buttercream Icing

2 sticks of butter
4 cups of confectioner's sugar, sifted
2 teaspoons vanilla extract
3-5 tablespoons half and half

Using a mixer, beat butter until it is fluffy.  Add 3 cups of sugar - one cup at a time - mixing until it's completely incorporated.  Add vanilla and half and half along with last cup of sugar and mix, adding more half and half until the icing is the desired consistency.

We decided to use the same four colors of the cupcakes for the icing.  I split the buttercream into four bowls and Amy added the gel dye.  When she was done mixing, I spooned a small amount of each color, one on top of the other, into a pastry bag.  The result was much closer to what I had in mind color-wise.  The colors did mix together in the bag creating some new shades, but I loved the finished cupcake!


After the cupcakes were frosted, we put a ring of icing on the base of a Whoopie Pie and capped it off.  We loved them, too!


I read about a THIRD method of making color swirl icing, which I'll try at another time.  In the meantime, I am really taken by these neon cakes.  They make me smile, and, hopefully, they'll do the same for you, too!


Cast Party Wednesday


Button

Wednesday, January 4, 2012

Please, Sir, May I Have A S'more?


I don't know about you, but where I live it's under 20 degrees Fahrenheit these days.  Obviously, that's too cold to make S'mores sitting outside by a campfire.  So, I am bringing the S'more's inside to my warm kitchen!  This is a delicious, graham crackery cookie version of the classic treat.

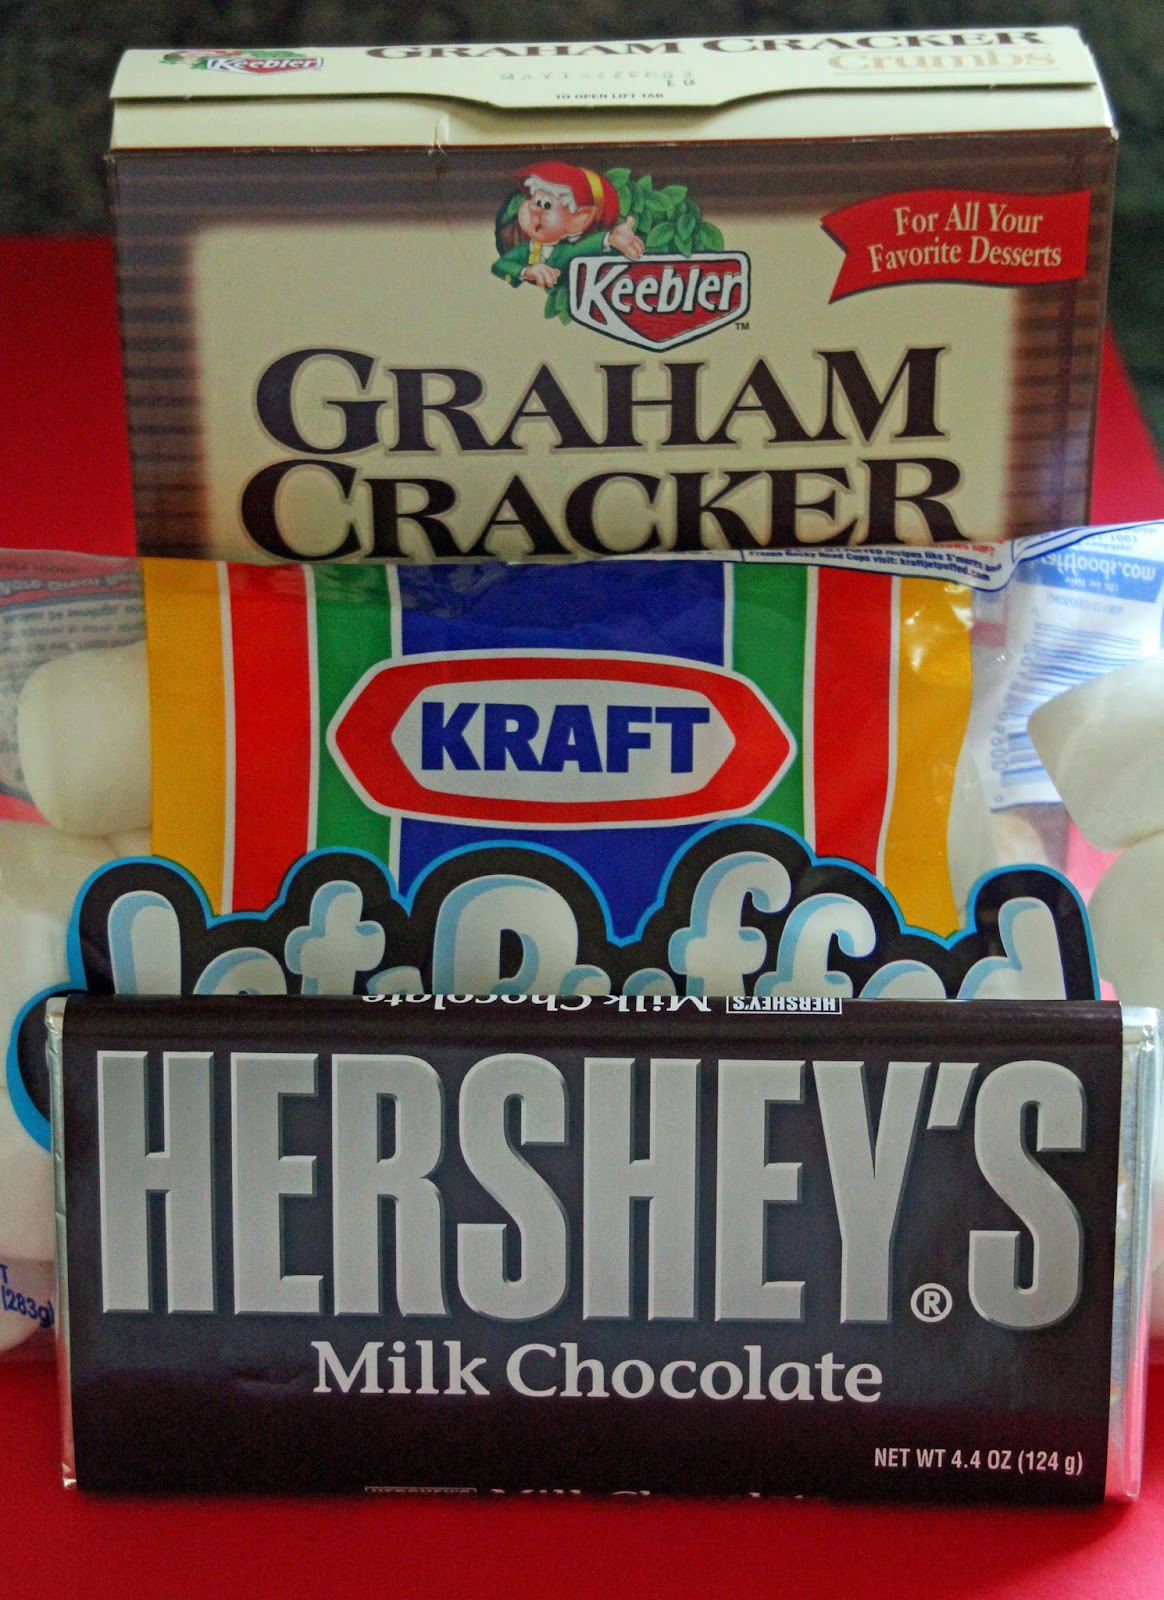
To begin, you need to assemble the usual ingredients, plus a few more.  But first the essentials!


This recipe comes from one of my favorite sources of clever food ideas - those Pillsbury Classic Cookbooks you find in the magazine rack in most grocery check out lanes.  These Smore's Cookies can be found in the December 2007/January 2008 Holiday Cookie edition.

S'more Thumbprint Cookies
from Pillsbury Classic Cookbook

1 cup butter softened
1/2 cup packed brown sugar
1 egg
1 teaspoon vanilla
1 1/3 cups all-purpose flour
1 cup finely ground graham cracker crumbs (16 cracker squares)
1/8 teaspoon salt
120 miniature marshmallows
60 rectangles milk chocolate (four 1.55oz bars)

Preheat oven to 325 degrees.  In a large bowl, beat butter and brown sugar with electric mixer on medium speed until light and fluffy.  Add egg and vanilla; beat until well blended.  Add flour, cracker crumbs and salt; on low speed beat about 1 minute or until stiff dough forms.

Roll dough  into 60 balls and place on ungreased cookie sheets about 2 inches apart.  With thumb, make indentation in center of each.


Bake 10-12 minutes or until cookies are firm and edges are just beginning to brown.

One of the things I love about these cookies is that they don't spread while baking!

Lightly press 2 marshmallows in center of each cookie; bake 2-3 minutes longer.  


After removing cookies from oven place a rectangle of chocolate on top of the marshmallows.  


Let stand 2-3 minutes.  With tip of knife, gently spread chocolate over marshmallows.


 Let stand until chocolate is set.

Note:  To make graham cracker crumbs break 16 squares into food processor bowl with metal blade.  Cover; process until fine crumbs.  I have also placed the crackers in a large ziploc bag and crushed them with a rolling pin.  

That's it!  Super easy and super fun.  They taste great, too.  I actually enjoy eating one or two before the chocolate sets, while it's warm and gooey.


I also kind of like the way the cookie look without spreading the chocolate.  I like the HERSHEY written across the top.  I like them both ways, it's really a preference thing.  Regardless of how you decide to serve them, I hope you enjoy the summery/fall goodness of S'mores all year round!


I have shared this recipe on:


Sunday, December 18, 2011

Frog and Lamb Cupcakes


Just before leaving for our trip to India, my family celebrated my twin nieces 5th birthday.  Since they were very small, Abigail has loved frogs and Madeline loves her lambs.  So, I wanted to create fun birthday treats for them.  While browsing on Pinterest (if you haven't signed up for Pinterest yet, you should!  It's a virtual pinboard filled with ideas and inspiration for just about anything you can think of!)

Many times on Pinterest you can find how-to's or recipes but in this instance, I had to work off the photos alone.  These did not appear to be too complicated so I gave them a go!

To begin, I made Funfetti cupcakes for the girls.  I baked them as directed.


While they were cooling, I started to make the froggy eyes and lamb heads.  The original picture of the frog eyes looked to be sliced marshmallows and chocolate chips.  I wanted a deeper black eye dot and cleaner circles, so I went with white chocolate wafers and black cake gel.    I used the flat part of the chocolate wafer to add the black dot, as you can see in the photo below.  While the gel was setting I started working with pre-made black fondant, which I purchased at Michaels craft store.  This was my first time working with fondant, and I didn't see a need to try making homemade since no one eats it anyway.  At least no one I know does.  So, bought it and was surprised at how it had a liquidy film around it and how and messy it was!  At first I assumed it was a bad batch, or too old, or something wrong.  However, as I worked it all together with my hands it became firmer and drier.  Once this was done I made nice round ball shapes and flattened them out  to add the eyes, as in the photo below:


Once I was done I referenced the lamb cupcake picture I was working from and saw that a flattened ball was completely the wrong shape!  I needed to make a much smaller OVAL shape and add tiny ears, as in the photo below:


I never follow the first rule in baking....ALWAYS read the entire recipe first (or in this case, double check the photo you are following).  Save yourself the trouble and wasted time!  I share this mistake of mine with you as a cautionary tale!

Once the lamb heads were done, I melted some white chocolate in a squeeze bottle.  I wanted to add small white dots to make eyes on the fondant shapes.  Be warned that if you try to do this immediately after melting the chocolate it will be extremely runny and you will not have control over how much comes out.  A mess will ensue.  Again, a firsthand cautionary tale.


To finish the eyes, I used the same black gel I used for the frog eyes to dot the white chocolate.  Then, I took the top of the chocolate squeeze bottle (after removing it from the bottle and rinsing the chocolate off) to make two indents for a nose shape.


I mixed up two batches of buttercream icing.  From the first batch I put aside a few spoonfuls to dye red for the frog mouth.  I dyed the remaining icing a deep green.  Just green alone wasn't achieving the shade I wanted, so I added a small bit of blue and then red to the green.  I don't know the exact number of drops I used, I just played around with it until I was happy.  It's important to add one drop at a time, though, so you don't overdo it and ruin the icing color.

Next, I iced the frog cupcakes, trying to make them as smooth as possible.  I took the spoonfuls of icing I set aside and added red gel.  After placing the eyes on the cupcakes, I used a ziploc bag with a corner snipped off to pipe the smile on. They looked adorable!


As for the lamb cupcakes, I filled a piping bag with buttercream icing and used a #4 piping tip, lifting up and down repeatedly on the top of the cupcake to create a "fluffy" effect.  I added the pre-made fondant heads to the iced cupcakes, placing them at a small angle, finishing off by piping a bit more fluff on the top of the head.


The girls and party guests loved them!  Yes, they were cute, but they were also DELICIOUS!


Happy Birthday to two of my favorite girls!!


A Little NoshI have shared this recipe with A Little Nosh for Tastetastic Thursday, a linky party.
It's a great site, head over there to check it out for some great ideas and inspiration!

Saturday, October 29, 2011

Celebrating Star Wars!


Last month George Lucas released the Star Wars Saga on Blu-ray.  This was a big day for the fans!  I'm a bit late in the game, but I had some Star Wars baking tools I wanted to experiment with in honor of my favorite Movie Trilogies!

First, I purchased a Star Wars cookie cutter set from Williams-Sonoma.  It 's an absolutely fantastic set, however I will need to spend more time figuring out how to ice them more appropriately, or if they should be iced at all.  I started with Darth Vader, as I wanted to use a chocolate cookie dough.  These cutters also are press cookies that make a crisp, indented image in the cut out.


The one pictured above is covered in flour so that I don't forget to tell you that you MUST dip the cutter in flour each time you cutout a cookie or dough will become stuck in the crevices and the shape will be unusable.  I learned this the hard way!  

So, you begin by mixing up chocolate cut-out cookie dough.  This is my favorite recipe:

Chocolate Cut-Out Cookies
adapted from recipe found on Bake at 350 (also my inspiration for these cookies!)

1 cup unsalted butter
1 cup sugar
1 egg
1 teaspoon vanilla
1/2 cup baking cocoa
1/2 teaspoon coarse salt
2 1/2 cups all-purpose flour

Preheat oven to 350 degrees. Whisk together the dry ingredients and set them aside. Cream together butter and sugar. Beat in the egg and vanilla. Combine the flour mixture a little at a time. Roll the dough onto a floured/cocoa-ed surface. Cut out desired shapes with selected cookie cutters. Freeze cut-outs on cookie sheet for 5 minutes before baking to ensure baked cookies will keep their shape. Decorate with icing as desired.

Next, roll out the dough and start cutting the shapes.  With the press cutters, once you have positioned the cutter and pressed it into the dough, you should press down again to create a nice, indented image on the cookie.  Be sure to roll and cut the cookies on a FLOURED surface (again, if you don't properly flour the cookie will stick to the rolling surface and become extremely difficult to remove, likely resulting in tearing the shape).

This is what you don't want (shape stuck to counter):


This is what you do want (shape lifted up with cutter):


To remove the cookie, push the press down, place cutout on a cookie sheet.  Do not worry about the white flour on the cookie, it will bake right in:


Once they are baked, you can decorate them after they've cooled.  I mixed up some black icing to pipe into the crevices of the cookie.  It was much more difficult than I expected.  I used very thick icing and a #1 tip, but it still spread into other parts of the cookie.  I began to get the hang of it, but between you and me I was glad I ran out of cookies to pipe!  


Now, moving on from frustrating to extremely frustrating:  Cupcake Stencils.  These were also purchased at Williams-Sonoma.  Of course, the box instructions make it look so easy.  The idea is that the stencils are curved to mimic the dome of a cupcake to ensure crisp lines and perfect images.  I tried, I really did.  Many times.  I re-frosted cupcakes and started over and over again.  The stencils would stick to the frosting making the design messy when lifting the stencil up.  The sugar would build up in the middle of the design and not cover the edges.  All sorts of problems.  I'm not used to not being able to  figure out a way to get something the way I would like it to be.  In this instance the stencils won and I was defeated.  I suppose the force was not with me.  I need further baking Jedi training and Yoda's calming influence!

One bit of advice, let the frosting set for a few minutes so the stencil won't stick as much.


This cupcake had been frosted and re-frosted so many times it became a bit messy.
I also made cupcakes with the rest of the stencils, too, just for "fun".  Here they are:


I'm not 100% sure I will try these again.  We'll see!  This is one of the instances I would have preferred not to post my baking project because I'm not happy with it.  However, I promised I would share the good and the bad.  It's all in the trying anyway!  Happy Baking.  :)

Saturday, August 20, 2011

Peanut Butter Kiss Cookies: Prettier in Pink!


I wanted to make something simple and fun after the golf course, so I chose these adorable cookies. I first saw these cookies here: http://dailynibbles.com/2011/02/01/in-the-kitchen-pink-peanut-butter-hugs/, and immediately fell in love. Pink is my favorite color, they mimic the hot pink/zebra combination that is so popular right now, and they just make me smile. Turns out, as is often the case with baking something for the first time, it wasn't so easy! Coloring these correctly took a few tries...3 batches of dough later I was finally pleased with the result.

To make these cookie you will need the following things:


Your favorite Peanut Butter Cookie recipe, pink sanding sugar, Hershey Hugs, neon pink gel food coloring, and red gel food coloring (optional). I have a Peanut Butter Cookie recipe I have been following forever and I love it so much I would hesitate to even think about using another one. Here it is:

Peanut Butter Cookies (adapted from Betty Crocker's Cookbook)

1/2 cup granulated sugar
1/2 cup brown sugar
1/2 cup peanut butter (I prefer Reese's Peanut Butter)
1/4 cup shortening (I prefer Crisco baking sticks, butter flavor)
1/4 cup butter, softened
2 tablespoons milk
1 egg
1 1/4 cups all purpose flour
3/4 teaspoon baking soda
1/2 teaspoon baking powder

Cream together the butter, shortening, and peanut butter. Mix in sugars, egg and milk. Add the remaining ingredients. Preheat oven to 375 degrees. Roll the dough into 1 1/2 - 2 inch balls and place on an ungreased cookie sheet at least three inches apart. Using a fork make a crisscross pattern by pressing down on the cookie. Dip the fork in flour between cookies to prevent the dough from sticking. Bake between 9-10 minutes. Let cookies cool several minutes before removing them from cookie sheet.

Since I was making pink cookies, I added a few drops of AmeriColor's Christmas Red gel food dye. I read this would make a terrific shade of hot pink. I used a hand mixer to incorporate the color; doing it by hand proved to be impossible for me, I am not strong enough to evenly mix it completely.

I had some issues with coloring the dough, which I will explain in a moment. Once the desired color is mixed into the dough, roll it into 1 1/2 - 2 inch balls, dredge through pink sugar until fully coated, and bake:


After the cookies are finished baking, immediately place a Hershey Hug in the middle of the cookie, pressing it down about 1/2 way. The Hug will keep it's shape as long as it's not touched (the chocolate will half melt from the heat of the cookie). Once the cookie and the chocolate cool completely, the Hug will become solid again and the cookies can be packaged or placed in an airtight container to store.


Voila! Adorable hot pink zebra strip peanut butter cookies! Now, let's go over coloring the dough.

For the first batch I mixed up, I didn't think it was possible for it to turn pink with only a few drops of Christmas red, so I added some neon pink. I baked them and was not pleased. So, I mixed up another batch and mixed in the neon pink, still was skeptical of how they would look baked, panicked and added some red. This was close, much better, but still too dark for my taste. After thinking about it, and not ready to give up, I decided to mix up a third batch of dough and split it in two. In one half I mixed in only Christmas red dye. In the other half, I mixed in only neon pink. Here are the results of all four trials:

From Top to bottom: Uncooked dough, baked cookie with no sugar, finished cookie with sugar and hug.
The first column is the mostly red dye with some neon pink added. The second column is mostly neon pink with some red added. The third column is red dye only, and the fourth neon pink only. I had to use my judgement on how much dye to add. I was almost ready to stop at my second attempt (second column), but I'm happy I experimented with only using one color. Here is a close-up of column two and column four finished cookies, the two I decided were closest shade of the hot pink I was trying to achieve:

Cookie on left is neon pink and red dye, cookie on right is neon pink dye only.
The cookie on the left had a bit too much of a red hue and in certain light did not appear pink enough. So, the cookie on the right is the winner! I mixed approximately 6 drops of food coloring in one batch of cookie dough. I may add a bit more to darken the pink a bit, but three batches of cookies later I finally achieved my goal and I'm happy!