Showing posts with label cookie. Show all posts

Tuesday, May 22, 2012

No-Bake Vanilla Ice Cream Raspberry Sherbet Pie


Forgive me Blog Readers...it's been too long since my last post!  I was busy with my Father visiting from Buffalo and then I drove him back home for a visit with the rest of my family.  OF COURSE, I came down with some kind of awful flu while traveling, which I've been fighting for these last weeks.  Next thing I know, May has nearly passed me by.  Which brings me to now...ready to back into the swing of things with baking and blogging!

With summer nearly here, I'd wanted to try my hand at a Vanilla Ice Cream Raspberry Sherbet Pie that caught my eye.  I'm going to share the recipe with you, but I'm going to cut to the chase and share my opinion that this dessert is a lot of effort to put together and wasn't as delicious as I expected.  The flavor combination seemed like a winning one, but, for me, not so much.  It looks pretty, though ,doesn't it?!


Some of my issues may have stemmed from my lack of experience working with ice cream (that whole slightly melted vs. too melted thing).  I always seem to miss the mark of this exact science, leaving me with such a mess to clean up:


No-Bake Vanilla Ice Cream Raspberry Sherbet Pie
Recipe from "Spring Get Togethers" by Pillsbury

Crust
2 cups crushed chocolate cookies (wafer)
1/3 cup melted butter
1/4 cup sugar

Filling
1 cup chocolate fudge sauce, slightly softened
1 quart vanilla ice cream, slightly softened
1 pint raspberry sherbet, slightly softened
12 oz. frozen raspberries

Topping
1 cup heavy cream/whipping cream
1/4 cup granulated sugar
1 teaspoon pure vanilla extract

Begin by crushing the wafer cookies.  I placed mine in a large plastic ziploc bag and used a rolling pin to crush them.  Mix in the sugar.  Put 1/4 cup of sugar/crumb mixture aside for garnish.  Add melted butter to remaining crumbs and stir until combined.  Press the crust mixture into the bottom of a 9x13 baking pan.  Place in refrigerator to set for 15 minutes.


Remove crust from refrigerator and spread fudge sauce over the top.


Place spoonfuls of vanilla ice cream on the fudge and spread evenly.


Next, place spoonfuls of raspberry sherbet on top of the ice cream.  Using as spoon, gently spread the sherbet into the ice cream, combining to create swirls. 


Randomly place frozen raspberries on top, pressing them into the sherbet.


To make the whipped cream topping, pour heavy cream, sugar and vanilla into a chilled bowl.  Using chilled beaters, beat until stiff peaks form (about 3 minutes).  Spread whipped topping over the pie.  Garnish with reserved chocolate crumb mixture.  


Cover and freeze for at least six hours.  Before serving, let stand at room temperature for 10-15 minutes.


And here are my notes:

1.  I must have made the crust too thick since I used a pie dish instead of rectangular pan.  It was nearly impossible to cut through and did NOT produce nice, neat squares.

2.  I did not care for the sherbet taste.  If I make this again I will try raspberry ice cream for a deeper, raspberry taste that goes so nicely with chocolate.

3.  I didn't think the frozen raspberries added anything.  I would try using fresh raspberries that freeze with the ice cream in another attempt.

4.  The recipe actually used whipped topping instead of homemade whipped cream.  I made the substitution.  I didn't like the whipped cream on top -  can someone tell me if frozen whipped topping would actually be preferable to homemade when freezing??

I don't mean to be a downer about this dessert, you may love it!  If you give it a try, let me know how it worked out for you!!


Wednesday, March 14, 2012

Shortbread Cookies - Raspberry and Almond


So, yes, I am on a bit of a shortbread cookie kick right now.  I'm like this with most things in life...can't get enough of something and then move on to the next obsession!  Meals, TV shows, songs, outfits, and now shortbread cookies.

This time, I wanted to add different extracts to my favorite shortbread recipe; the one I used for the Cherry Hearts Dipped in Chocolate.  I love it as a buttery shortbread, but I also think it's a good base for adding different flavors to change things up.  The Peanut Butter with Chocolate Chip Shortbread Cookies and Dutch Chocolate Shortbread with Peanut Butter Chips Cookies recipes are quite different from this one.  Those, as I wrote, are melt-in-your-mouth soft, crumbly cookies.  This recipe has an initial "crunch" at first bite with a soft chewy center.  I really love that combination.

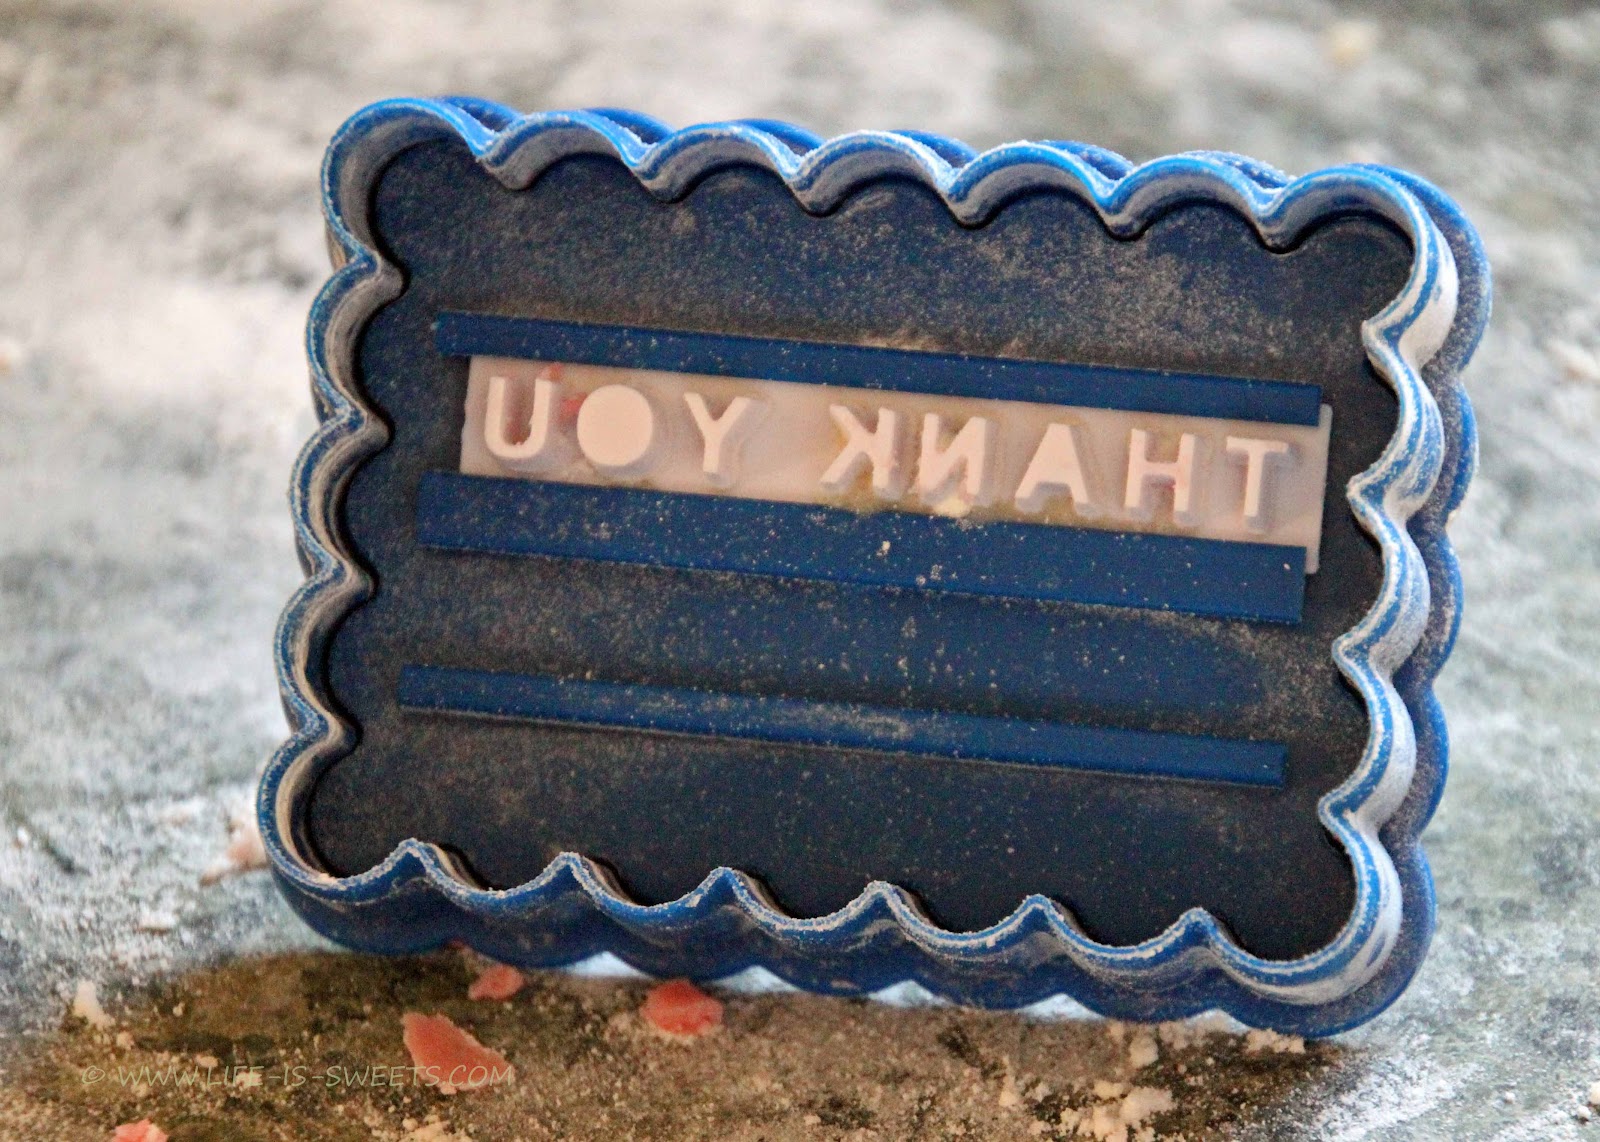
I was making these cookies as a "Thank You", which was a great opportunity to use my new cutter set from Williams-Sonoma.  There are three basic shapes and removable sayings and letters to spell out whatever you wish.  This was my first time using them:


As I was going through lots of shortbread cookie recipes trying to find what I wanted to use, I read many user comments and one thing really stuck out to me.  People seem to confuse shortbread cookies with cut-out cookie recipes.  There seems to be an expectation that using a cookie cutter with shortbread will produce the same result as sugar cookies.  This is not at all true.  I was not sure what to expect using these cutters, especially with the words imprinted, I was completely experimenting.  Shortbread cookies are very crumbly and do not hold their shape as precisely when baking as cut-outs.  They are a dryer tasting cookie, delicious in their own way, but different.  Knowing this ahead of time will help manage expectations of what you are trying to achieve.

Shortbread Cookies
Adapted slightly from Ina Garten

3/4 pound unsalted butter at room temperature
1 cup sugar, plus extra for sprinkling
1 teaspoon pure vanilla extract
1 teaspoon raspberry extract
3 1/2 cups all-purpose flour
1/4 teaspoon salt
A few drops red food coloring (to desired hue)
6 to 7 ounces very good semisweet chocolate, finely chopped


(To make the almond version, substitute 1 teaspoon almond extract for the raspberry extract and omit the food coloring)

Preheat oven to 350 degrees F

In the bowl of an electric mixer fitted with the paddle attachment, mix together butter and one cup of sugar until they are just combined.  Add the vanilla, raspberry extract and food coloring..  In a medium bowl, sift together the flour and salt and add them to the butter/sugar mixture.  Mix on low speed until the dough starts to come together.  Dump onto a surface dusted with flour and shape into a disk.  Wrap in plastic and chill for 30 minutes.

Roll the dough 1/2 inch thick and cut with chosen cutter.  Place cookies on an ungreased cookie sheet and sprinkle with sugar.  


Bake 20-25 minutes or until edges begin to brown slightly.  DO NOT OVERBAKE!!!  Allow to cool to room temperature.


When the cookies are cooled, place them on a cookie sheet lined with parchment paper.  Put 3 ounces of chocolate in a glass bowl and microwave on high for 30 seconds.  Stir with a wooden spoon.  Continue to head and stir in 30 second intervals until the chocolate is just melted.  Add the remaining chocolate and allow to sit at room temperature , stirring often, until it is completely smooth.  Stir vigorously until the chocolate is cooled and smooth and slightly cooled.  Stirring makes it glossier.


Drizzle each cookie half way with enough chocolate to coat it.


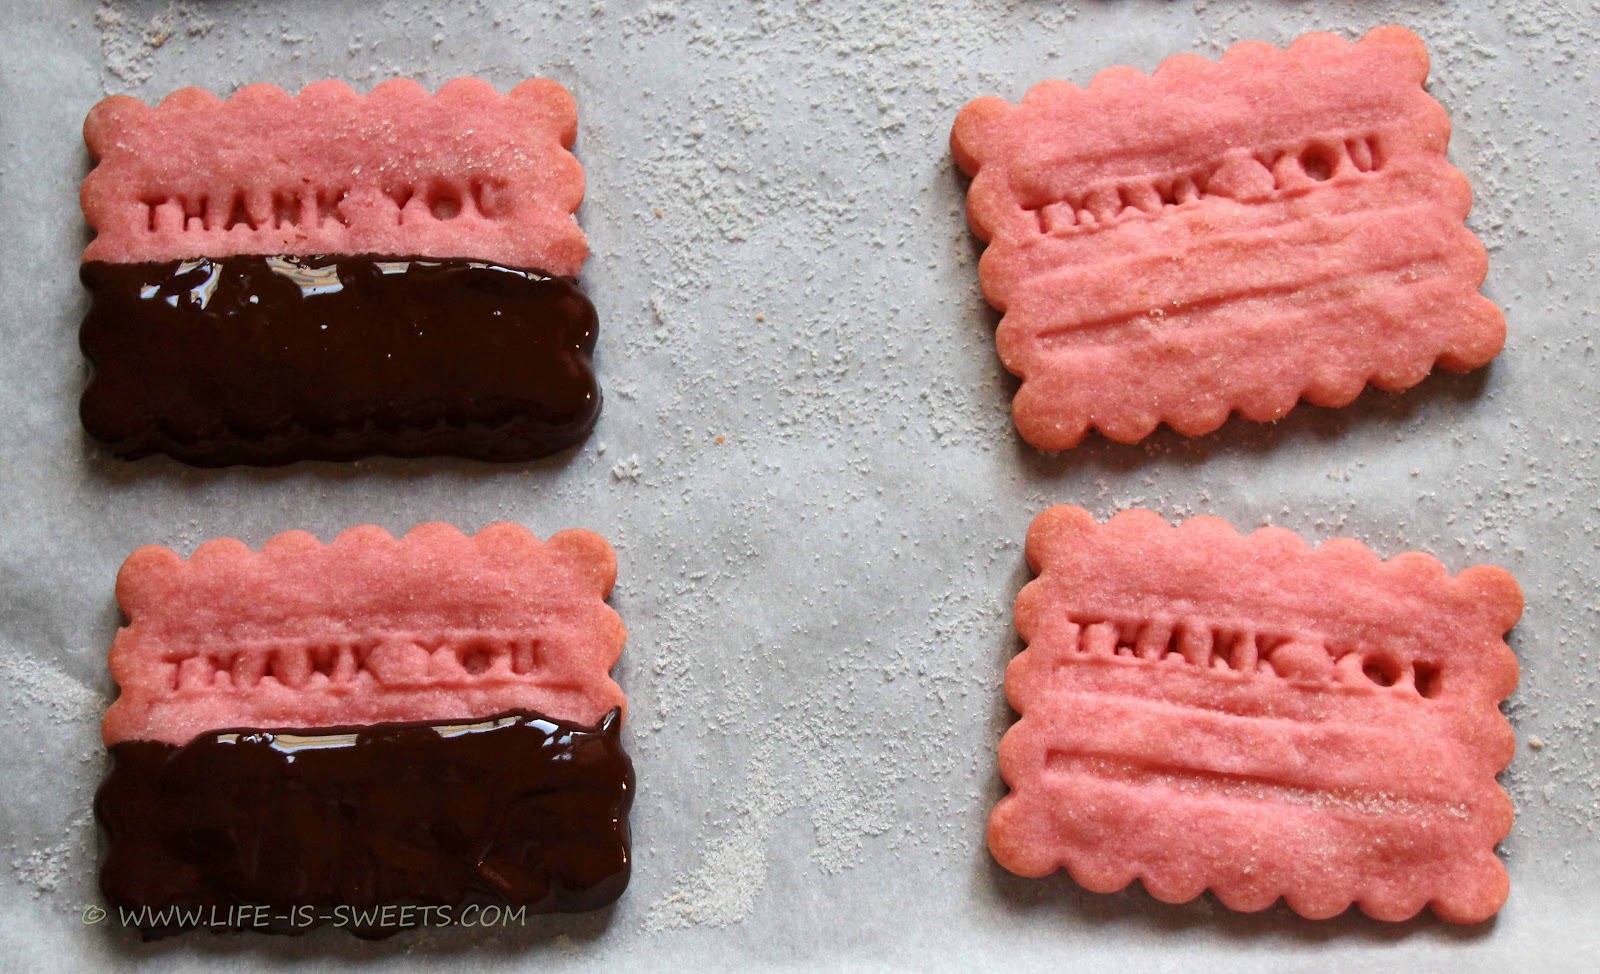
First, though these may not be the pretties cookies, they taste GOOD!  I love this recipe!!  You may note what I was talking about with the shape holding up while baking.  The letters are askew and uneven.  Fortunately, this does not affect the taste!  For this cookie experiment, the flavor was a success, the cut-outs not so much.  Next time, I will use a simple cutter with no lettering.

This will conclude my foray into shortbread cookies!  I have several orders to fill in the next few days that need my attention.  There will be cakepops, brownies, bailey's cupcakes, green velvet cupcakes, and Minnie Mouse cupcakes.  Yay!


Sunday, March 11, 2012

Dutch Chocolate Shortbread Cookies with Peanut Butter Chips


Yeah, this is a good cookie!  After making the Peanut Butter Chocolate Chip Shortbread Cookies I was thinking the only thing that could taste better would be Chocolate Shortbread with Peanut Butter Chips!  I don't know why, but a chocolate cookie base gets me every time.  It's a weakness.  :)

I searched everywhere for a chocolate shortbread recipe that would fit what I had in mind.  I found myself in the same reference place as with the Peanut Butter Shortbread - The View From Great Island.  She's some kind of a shortbread genius!  These cookies absolutely melt in your mouth and I am a huge fan of rolling the dough into a log to slice and bake the cookies.  Super smart!

Dutch Chocolate Shortbread Cookies with Peanut Butter Chips
adapted very slightly from The View From Great Island

1 stick butter (I used salted), room temperature
1/4 cup confectioner's sugar
1 teaspoon vanilla extract
3/4 cup all-purpose flour
1/4 cup dutch processed cocoa
peanut butter chips
milk chocolate chips, if desired
  • In medium bowl, whisk together sugar, flour, and cocoa.
  • In large bowl, beat together butter and vanilla until fluffy.
  • Add dry ingredients to butter and combine together with electric mixer.
  • Dough will be extremely crumbly.  After ingredients are combined, use a wooden spoon to mix crumbs into a dough.
  • Add peanut butter chips, whatever your desired amount is.  I like a lot.
  • Since this cookie dough is not overly sweet, add a small amount of milk chocolate chips, if desired, just to give it a little more sugary chocolate taste.
  • Turn dough onto waxed paper and shape into log.
  • Wrap waxed paper around log of dough and twist ends like a piece of candy.

  • Refrigerate for a few hours or overnight.
  • Remove waxed paper and slice dough into discs.  Place on cookie sheet.

  • Bake at 350 degrees for 12-14 minutes.
  • Cookies will be extremely soft when finished baking. DO NOT overbake!  
  • Let cookies cool on baking sheet for 15 minutes before removing.  When they are cooled they will be solid.
  • Eat and enjoy!

I really love these cookies!  They have a perfect balance of chocolate and peanut butter.  I think the addition of milk chocolate chips adds the right amount of sweetness to elevate the chocolate taste, which makes the peanut butter shine!  As I mentioned in my last shortbread post - these cookies are so easy and so quickly put together they make a nice day-of dessert with minimal fuss.  If you like shortbread cookies, peanut butter, and chocolate....this is a winner!


Wednesday, February 1, 2012

Oreo Cookies and Cream Cupcakes


My plan to do auto-posting while I was away on vacation this past week did not work.  I have to figure it out!  So, now I am manually posting later than I planned.  Here we go!

Cookie's and Cream Cupcakes: Everyone is making these, I see them everywhere.   I even baked a version of them when I first began this blog.  During that trial I used a box cake mix and wasn't happy with the taste.  Also, I did not show how to make them, which I will do this time around!

The vanilla cupcake recipe is:

Scratch Cookies and Cream Vanilla Cupcakes
Adapted slightly from Martha Stewart

3 cups all-purpose flour
1 1/2 teaspoons baking powder
3/4 teaspoon salt
12 tablespoons (1 1/2 sticks) unsalted butter at room temperature
1 1/2 cups sugar
4 large eggs
2 teaspoons pure vanilla extract
1 1/4 cups milk
1 cup of crushed Oreo Cookies
24 Large Oreo Cookies
Mini Oreo Cookies for garnish

Preheat oven to 350 degrees.  Line cupcake pan with liners; set aside.  In a medium mixing bowl whisk together flour, baking powder and salt.  In a large mixing bowl cream together butter and sugar until fluffy.  Add eggs, one at a time,  mixing until incorporated.  Scrape down sides of bowl and mix in vanilla.

Add flour and milk alternately, beginning and ending with flour.  Stir in crushed cookie bits.  Scrape down sides of bowl.  


Spoon a small amount of batter into the bottom of each liner.  Put a regular size Oreo Cookie on top.  Contine to divide batter evenly among liners on top of the cookies, filling each about 2/3 full.  


Bake until cake springs back, approximately 18-20 minutes.  After removing pan from over place on wire rack to cool for 5 minutes.  Remove cupcakes from pan and let cool completely on rack.  When cooled, top with buttercream icing and garnish with mini Oreo Cookie.

Vanilla Buttercream Icing

2 sticks of butter (I did use salted)
4 cups of confectioner's sugar, sifted
2 teaspoons vanilla extract
1/2 cup of crushed Oreo Cookies
3-5 tablespoons half and half

Place Oreos into a Ziploc Freezer size bag.


Use a rolling pin, water  bottle, anything you can roll across the cookies to crush them.


Using a mixer, beat butter until it is fluffy.  Add 3 cups of sugar - one cup at a time - mixing until it's completely incorporated.  Add vanilla, half and half, and cookie bits along with the last cup of sugar and mix together, adding more half and half until the icing is the desired consistency.  Pipe icing onto cupcakes and garnish with an Oreo Mini.


This is the Martha Stewart Cupcake recipe I used for the Raspberry Buttercream Cookies, so the cake was a bit more dense than I would like.  Still looking for a scratch vanilla cupcake recipe!  I do love these Cookies and Cream Cupcakes, though, especially when you bite into it and find a cookie surprise inside!  :)


I have shared this recipe on:


Cast Party Wednesday 

Wednesday, January 4, 2012

Please, Sir, May I Have A S'more?


I don't know about you, but where I live it's under 20 degrees Fahrenheit these days.  Obviously, that's too cold to make S'mores sitting outside by a campfire.  So, I am bringing the S'more's inside to my warm kitchen!  This is a delicious, graham crackery cookie version of the classic treat.

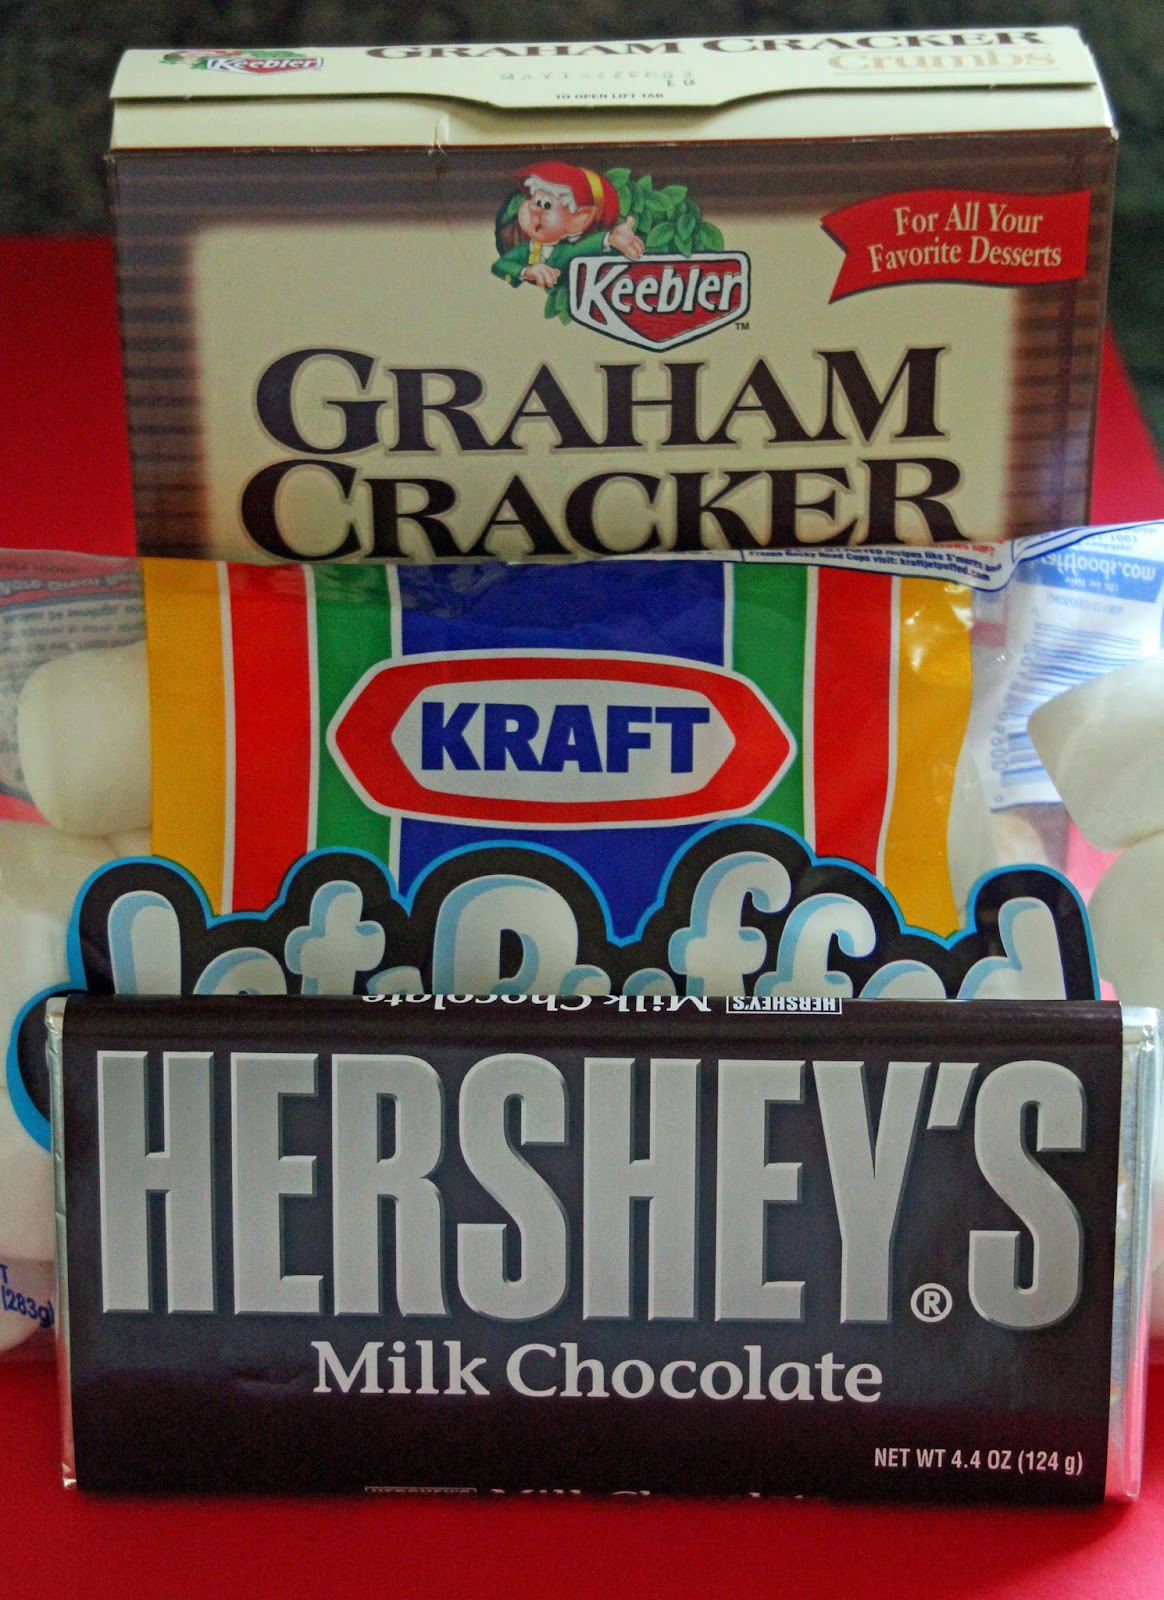
To begin, you need to assemble the usual ingredients, plus a few more.  But first the essentials!


This recipe comes from one of my favorite sources of clever food ideas - those Pillsbury Classic Cookbooks you find in the magazine rack in most grocery check out lanes.  These Smore's Cookies can be found in the December 2007/January 2008 Holiday Cookie edition.

S'more Thumbprint Cookies
from Pillsbury Classic Cookbook

1 cup butter softened
1/2 cup packed brown sugar
1 egg
1 teaspoon vanilla
1 1/3 cups all-purpose flour
1 cup finely ground graham cracker crumbs (16 cracker squares)
1/8 teaspoon salt
120 miniature marshmallows
60 rectangles milk chocolate (four 1.55oz bars)

Preheat oven to 325 degrees.  In a large bowl, beat butter and brown sugar with electric mixer on medium speed until light and fluffy.  Add egg and vanilla; beat until well blended.  Add flour, cracker crumbs and salt; on low speed beat about 1 minute or until stiff dough forms.

Roll dough  into 60 balls and place on ungreased cookie sheets about 2 inches apart.  With thumb, make indentation in center of each.


Bake 10-12 minutes or until cookies are firm and edges are just beginning to brown.

One of the things I love about these cookies is that they don't spread while baking!

Lightly press 2 marshmallows in center of each cookie; bake 2-3 minutes longer.  


After removing cookies from oven place a rectangle of chocolate on top of the marshmallows.  


Let stand 2-3 minutes.  With tip of knife, gently spread chocolate over marshmallows.


 Let stand until chocolate is set.

Note:  To make graham cracker crumbs break 16 squares into food processor bowl with metal blade.  Cover; process until fine crumbs.  I have also placed the crackers in a large ziploc bag and crushed them with a rolling pin.  

That's it!  Super easy and super fun.  They taste great, too.  I actually enjoy eating one or two before the chocolate sets, while it's warm and gooey.


I also kind of like the way the cookie look without spreading the chocolate.  I like the HERSHEY written across the top.  I like them both ways, it's really a preference thing.  Regardless of how you decide to serve them, I hope you enjoy the summery/fall goodness of S'mores all year round!


I have shared this recipe on:


Sunday, January 1, 2012

My All Time Favorite - Peanut Butter Blossoms!


If there's one cookie I have no self control over, it's the Peanut Butter Blossom.  I think this cookie is absolute perfection.  Chocolate and peanut butter goodness.  And they're cute, too!

Since I've started this blog, the most popular post by far has been my pink peanut butter zebra stripe cookie.  It's just a variation on a theme; using pink dye for the dough and a Hershey Hug rather than a Kiss, and it has taken off like wildfire!  I'd like to give some love to the inspiration, the irreplaceable, the original Peanut Butter Blossom.

For me, this cookie represents the Thanksgiving through New Year's holiday season.  It's not a celebration if these are not present on the dessert table, so I made some.  More than some, actually.  I made a LOT.  Here's how I did it:


Peanut Butter Cookies (adapted from Betty Crocker's Cookbook)

1/2 cup granulated sugar
1/2 cup brown sugar
1/2 cup peanut butter (I prefer Reese's Peanut Butter)
1/4 cup shortening (I prefer Crisco baking sticks, butter flavor)
1/4 cup butter, softened
2 tablespoons milk
1 egg
1 1/4 cups all purpose flour
3/4 teaspoon baking soda
1/2 teaspoon baking powder

Cream together the butter, shortening, and peanut butter. Mix in sugars, egg and milk. Add the remaining ingredients. Preheat oven to 375 degrees. Roll the dough into 1 1/2 - 2 inch balls.  Dredge the balls through sugar and place on an ungreased cookie sheet at least three inches apart. 


Bake between 9-10 minutes.  While they are baking, unwrap enough Hershey Kiss's to place on top of each cookie.


After removing cookies from the oven, push a Hershey Kiss into the center of each one.  Let cookies cool several minutes before removing them from cookie sheet.


 Be careful not to touch the kiss for at least an hour after placing them on the cookie.  It will keep it's shape, but it will also be quite soft and easy to squish.  After a few hours they will be perfectly set and you can stack them in an airtight container for storage.  If they last that long!


Saturday, December 31, 2011

Snowflake Cut-Out Cookies


From my home to yours I'd like to wish you all a HAPPIEST NEW YEAR!!  May 2012 be your best yet!!!

Unfortunately for me, this holiday season I've been plagued by a cold/flu that won't seem to go away.  This meant I did not make nearly as many treats as I'd have liked.  I did the best I could, though, and had a great time with these snowflakes.  I really do love making cut-out cookies!  I find the icing of cookies very relaxing and great opportunity to be creative.  Snowflakes are the perfect shape to experiment with new designs and have some fun decorating.

I made both small and large cookies.  For the background of the cookie I chose a light blue so the white flake design would stand out more  I used the standard outline and flood method.  To decorate the small flakes, I used a #1 tip with a very thick icing mixture of water and sifted confectioners sugar poured into a pastry bag.  The icing was thick enough that my hand began to cramp up from squeezing.  I made the icing so thick because I did not want it to spread and not keep its' shape.  Despite the discomfort, I love the way they turned out!


I need much more work on my hand control to make the lines even.  I free-formed the designs and want to try different patterns.  I'm actually excited to make more!

For the large snowflake cookies, I used a #2 tip with what I THOUGHT was a thick enough icing, but it wasn't.  So, the lines spread out more than I'd hoped.  Since they were large it wasn't that big of a deal, so I finished them with the icing mixture I had prepared.  They were pretty, but I still think they would look lovelier with a thinner flake line.  When I make them again I'll post an update!