
The one year anniversary of my blog is coming up next month and one of my first projects was a golf course made out of cupcakes. At the time I thought it was a bit sad looking and had wanted to give it another go with the proper tools, namely a grass piping tip. Finally, I had a reason to do it when I was asked to create a cupcake golf course for a birthday party.
As with any cupcake project, I baked up the cakes! Once they cooled, I arranged them on a cake board. Without giving it much thought I designed the shape the same way I've noticed the courses on google - random and askew:

As with any cupcake project, I baked up the cakes! Once they cooled, I arranged them on a cake board. Without giving it much thought I designed the shape the same way I've noticed the courses on google - random and askew:

The order was for 20 chocolate and 20 vanilla cupcakes. I purposely placed the chocolate on the outside so it would resemble earth beneath the grass. I'm not sure it made a real difference. Vanilla would have been just fine. Next, I mixed up three batches of buttercream icing.
Vanilla Buttercream Icing
2 sticks of butter
4 cups of confectioner's sugar, sifted
2 teaspoons vanilla extract
3-5 tablespoons half and half
Using a mixer, beat butter until it is fluffy. Add 3 cups of sugar - one cup at a time - mixing until it's completely incorporated. Add vanilla and half and half along with last cup of sugar and mix, adding more half and half until the icing is the desired consistency.
I wanted to make enough to cover the entire golf course. Since I was dying the "grass" green, I needed enough to be sure I wouldn't need to mix more icing. If I needed to make more I couldn't guarantee the greens would match and that there wouldn't be a darker or lighter patch on the course. For 40 cupcakes three batches of icing was perfect. I didn't have much left over at all by the end!
So, I combined the three batches (I mixed them up separately to ensure it turned out okay. Recipes are funny like that; some you can double or triple with no consequences, some you have to make adjustments in the measurements. I was under a time crunch, so I played it safe mixing the buttercream in three separate batches. I spooned out a nice sized scoop for the water and another spoonful of white for the sand trap. I spread the blue and white over the areas I designated for the water and sand. On top of the white I sprinkled brown sugar. I thought it had a nice, sand-like texture. I've seen other courses where crushed Nilla Wafers or Graham Crackers were used for the sand and I think next time I will do that just to cut down on the sweetness factor.

Once the "water" and "sand" were applied, I filled a piping bag with some of the green icing fitted with a Wilton #233 grass tip. Using the green, I filled in the remaining surfaces of the cupcakes. My client asked me to make it look like a smooth course, not like separate cupcakes arranged as a course. To that end, I filled in the spaces between cupcakes with some icing for a surface to pipe the "grass" on top. Once I made some decent progress with the rough, I designated an area for the green. Using the same frosting/smoothing technique as for the "water" and "sand", I added green icing and topped it with some light green sanding sugar to mimic the short grass of the green. Then I continued piping the rough.

To finish the "water" I added some small chocolate rocks:

Lastly, for the golf course, was the flag and hole in the green. I used a wooden skewer (next time will use a lollipop stick) for the post and white fondant for the flag. The hole was an upside down chocolate chip and the golf ball a white dragee:

That's it! A bit time consuming to pipe all of the "grass", but EASY. As always, however, I have a few ideas to improve the design.
So, the order was for 40 cupcakes, but I was only able to fit 30 onto the cake board. For the remaining 10 cupcakes I made cupcakes designed to be a golf course "green".

Picture quality is not so great, but you get idea. I have a new macro lens and camera I'm still trying to figure out, which means some photos will be better than others until I work it all out. :)
In elementary school one of my teachers had each of us students write a paragraph on the first day of school. On the last day of the year she handed them back to us so we could see how our writing improved and how much we'd progressed during the course of the year. This golf course is kind of like that for me. When I see where I was a year ago and what I can do now, all just because I keep trying, it feels pretty good!

I wanted to make enough to cover the entire golf course. Since I was dying the "grass" green, I needed enough to be sure I wouldn't need to mix more icing. If I needed to make more I couldn't guarantee the greens would match and that there wouldn't be a darker or lighter patch on the course. For 40 cupcakes three batches of icing was perfect. I didn't have much left over at all by the end!
So, I combined the three batches (I mixed them up separately to ensure it turned out okay. Recipes are funny like that; some you can double or triple with no consequences, some you have to make adjustments in the measurements. I was under a time crunch, so I played it safe mixing the buttercream in three separate batches. I spooned out a nice sized scoop for the water and another spoonful of white for the sand trap. I spread the blue and white over the areas I designated for the water and sand. On top of the white I sprinkled brown sugar. I thought it had a nice, sand-like texture. I've seen other courses where crushed Nilla Wafers or Graham Crackers were used for the sand and I think next time I will do that just to cut down on the sweetness factor.
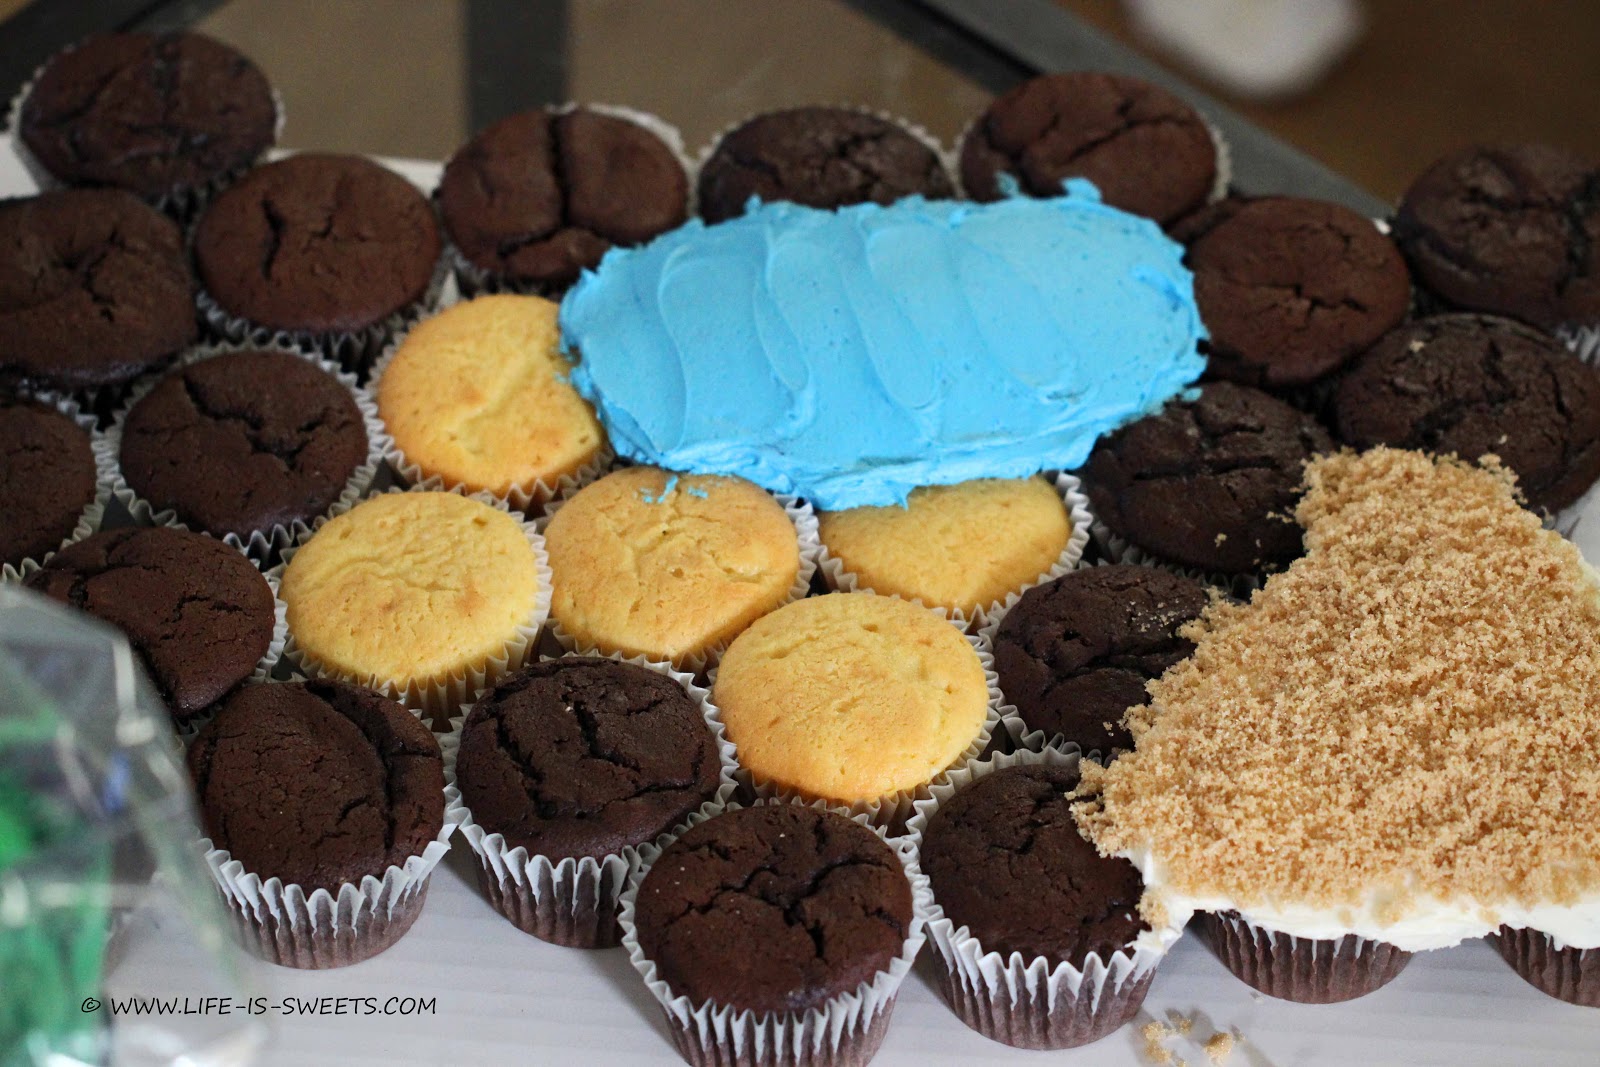
Once the "water" and "sand" were applied, I filled a piping bag with some of the green icing fitted with a Wilton #233 grass tip. Using the green, I filled in the remaining surfaces of the cupcakes. My client asked me to make it look like a smooth course, not like separate cupcakes arranged as a course. To that end, I filled in the spaces between cupcakes with some icing for a surface to pipe the "grass" on top. Once I made some decent progress with the rough, I designated an area for the green. Using the same frosting/smoothing technique as for the "water" and "sand", I added green icing and topped it with some light green sanding sugar to mimic the short grass of the green. Then I continued piping the rough.

To finish the "water" I added some small chocolate rocks:

Lastly, for the golf course, was the flag and hole in the green. I used a wooden skewer (next time will use a lollipop stick) for the post and white fondant for the flag. The hole was an upside down chocolate chip and the golf ball a white dragee:

That's it! A bit time consuming to pipe all of the "grass", but EASY. As always, however, I have a few ideas to improve the design.
So, the order was for 40 cupcakes, but I was only able to fit 30 onto the cake board. For the remaining 10 cupcakes I made cupcakes designed to be a golf course "green".

Picture quality is not so great, but you get idea. I have a new macro lens and camera I'm still trying to figure out, which means some photos will be better than others until I work it all out. :)
In elementary school one of my teachers had each of us students write a paragraph on the first day of school. On the last day of the year she handed them back to us so we could see how our writing improved and how much we'd progressed during the course of the year. This golf course is kind of like that for me. When I see where I was a year ago and what I can do now, all just because I keep trying, it feels pretty good!


