Showing posts with label raspberry. Show all posts

Friday, June 8, 2012

Pretty In Pink: Chocolate Desserts


I had an order for a baby shower with the request to use browns and pinks.  This was a fun assignment and I was excited.  However, it was also a little overwhelming coming up with designs with so much inspiration and ideas from research.  Also, if you follow me on Facebook, you know I had some issues with humidity, as in it's E-V-I-L, which upped the ante in completing this order.  For five days straight it was foggy 24/7 and without air conditioning I had to have the windows open in order to prevent suffocation.  I have either a) never experienced weather like this in my life or b) never noticed because I was baking all the time.  I'm just not sure.

Since I had this order why not just put in the air conditioners you ask?  Well, my husband was working 14 hour days and they are too heavy for me to install myself.  So that was that.

For instance, I was asked to make sugar cookies in a flower shape with pink icing.  I had to call and say I wasn't able.  The icing was NOT drying.  I had an idea to make chocolate cut-outs and to use melted pink chocolate for the flower outline.  I baked the cookies for an extra minute to dry them out a bit more and the pink chocolate worked just fine, so they turned out okay in the end.  For the incredible recipe for these cookies, click here.


The second part of the order was cake pops.  I had no issue making these, thankfully.  As for the design, I was going to use a squeeze bottle to decorate them with pink chocolate, but since I used some for the cookies it seemed too redundant.  I was asked to keep the design very clean and simple, so I used some brightly colored flower sugar candies I'd picked up at Michaels Craft Store.  I separated enough pink ones and used a toothpick to apply a bit of melted chocolate to the tops of the pops.  Then, using tweezers, I added the pink candy.  I actually really liked the final result!  For instructions to make cake pops, click here.


The next part of the order was chocolate cupcakes with raspberry filling.  I had a hard time making a filling that wasn't too runny, which made the cupcakes soggy.  Finally, I came up with something.  For directions detailing how to add filling to a cupcake, click here.  Next, I made some buttercream icing and on several I piled fluffy, pink frosting.


I decided to experiment with hand-rolled gum paste roses.  They kinda turned out okay.  I definitely need more practice making them.  Some looked more like roses than others.  The good news is I enjoyed making them.  It was a zen kind of project.


Lastly, for the chocolate cupcakes, I attempted to smooth the buttercream icing and make pink buttercream flowers with a dragee center.  As you can see, the concept was a good enough one, but, clearly, I need to work on this design.  With the moisture that permeated my house, the buttercream was acting fussy, too.  Yes, even the icing was in misery!!  ;)  To see a much prettier version of this flower design, click here.


And then there were the stars of the show...the Tiramisu Cupcakes.  I had to make a second batch after throwing out the first.  The idea is to poke holes on the top of each cupcake and then dip them in espresso.  The first batch was beyond soggy.  I was worried about the second batch, but they turned out just fine.  They were topped with an amazing Mascarpone Icing, finished with a dusting of cocoa powder and chocolate shavings.  Oh, they were beautiful.  I mean, I really loved them and felt proud of how they turned out.  So it was really too, too bad that they tipped over during the delivery and were a complete mess of icing and powder.  At least I have this pretty picture to remember them by:


*Sigh*  The good news is, they were (barely) able to be salvaged and everyone LOVED them.  All was forgiven and I didn't completely ruin the poor Woman's Baby Shower as I feared.  These cupcakes are so awesome they will be getting their own post soon.  Stay tuned!

Tuesday, May 22, 2012

No-Bake Vanilla Ice Cream Raspberry Sherbet Pie


Forgive me Blog Readers...it's been too long since my last post!  I was busy with my Father visiting from Buffalo and then I drove him back home for a visit with the rest of my family.  OF COURSE, I came down with some kind of awful flu while traveling, which I've been fighting for these last weeks.  Next thing I know, May has nearly passed me by.  Which brings me to now...ready to back into the swing of things with baking and blogging!

With summer nearly here, I'd wanted to try my hand at a Vanilla Ice Cream Raspberry Sherbet Pie that caught my eye.  I'm going to share the recipe with you, but I'm going to cut to the chase and share my opinion that this dessert is a lot of effort to put together and wasn't as delicious as I expected.  The flavor combination seemed like a winning one, but, for me, not so much.  It looks pretty, though ,doesn't it?!


Some of my issues may have stemmed from my lack of experience working with ice cream (that whole slightly melted vs. too melted thing).  I always seem to miss the mark of this exact science, leaving me with such a mess to clean up:


No-Bake Vanilla Ice Cream Raspberry Sherbet Pie
Recipe from "Spring Get Togethers" by Pillsbury

Crust
2 cups crushed chocolate cookies (wafer)
1/3 cup melted butter
1/4 cup sugar

Filling
1 cup chocolate fudge sauce, slightly softened
1 quart vanilla ice cream, slightly softened
1 pint raspberry sherbet, slightly softened
12 oz. frozen raspberries

Topping
1 cup heavy cream/whipping cream
1/4 cup granulated sugar
1 teaspoon pure vanilla extract

Begin by crushing the wafer cookies.  I placed mine in a large plastic ziploc bag and used a rolling pin to crush them.  Mix in the sugar.  Put 1/4 cup of sugar/crumb mixture aside for garnish.  Add melted butter to remaining crumbs and stir until combined.  Press the crust mixture into the bottom of a 9x13 baking pan.  Place in refrigerator to set for 15 minutes.


Remove crust from refrigerator and spread fudge sauce over the top.


Place spoonfuls of vanilla ice cream on the fudge and spread evenly.


Next, place spoonfuls of raspberry sherbet on top of the ice cream.  Using as spoon, gently spread the sherbet into the ice cream, combining to create swirls. 


Randomly place frozen raspberries on top, pressing them into the sherbet.


To make the whipped cream topping, pour heavy cream, sugar and vanilla into a chilled bowl.  Using chilled beaters, beat until stiff peaks form (about 3 minutes).  Spread whipped topping over the pie.  Garnish with reserved chocolate crumb mixture.  


Cover and freeze for at least six hours.  Before serving, let stand at room temperature for 10-15 minutes.


And here are my notes:

1.  I must have made the crust too thick since I used a pie dish instead of rectangular pan.  It was nearly impossible to cut through and did NOT produce nice, neat squares.

2.  I did not care for the sherbet taste.  If I make this again I will try raspberry ice cream for a deeper, raspberry taste that goes so nicely with chocolate.

3.  I didn't think the frozen raspberries added anything.  I would try using fresh raspberries that freeze with the ice cream in another attempt.

4.  The recipe actually used whipped topping instead of homemade whipped cream.  I made the substitution.  I didn't like the whipped cream on top -  can someone tell me if frozen whipped topping would actually be preferable to homemade when freezing??

I don't mean to be a downer about this dessert, you may love it!  If you give it a try, let me know how it worked out for you!!


Friday, March 30, 2012

Candy Cupcakes Part IV - Raspberry M&M Chocolate Cupcake with Raspberry Buttercream


And today is the last installment of my week with Candy Cupcakes!  I'll be glad to focus on Easter Treats next week because - is it okay to admit this? - I'm a bit sick of candy.  Yeah, I said it.   ;)  Reflecting on this past week  I realized I  used some form of M&M's in most of the cupcakes I made.  Thinking about it I concluded  it was because I'd never tried Mint, Raspberry, or M&M Minis before.  And now I know how awesome  M&M Minis are...less candy crunch to get to the chocolate taste.  Yay!  And as far as mini candies go, these are the cutest out there!

So, the cupcakes.  I sampled a Raspberry M&M and found the berry taste was pretty powerful.  I didn't want to make something that was overpoweringly Raspberry, losing the chocolate flavor.  After thinking about it I settled on two different types of chocolate cupcakes.


Chocolate Raspberry M&M crunch cupcake with fresh raspberry buttercream:


For these cupcakes, I added a bit of raspberry extract to the chocolate cake batter I mixed up.  Next, I crushed up Raspberry M&M's (I used a potato masher, rolling while pressing down on the M&M's.  It was actually not difficult!) and added them to the batter, mixing until fully incorporated.  I baked the cupcakes as directed.  When they cooled completely, I topped them with awesomely delicious Fresh Raspberry Buttercream, piping them with a 1M Wilton Tip in a classic swirl:

Raspberry Vanilla Buttercream Icing


2 sticks of butter (I did use salted)
4 cups of confectioner's sugar, sifted
1 teaspoons vanilla extract
1 teaspoon raspberry extract
1/2 cup of fresh raspberries
3-5 tablespoons half and half

Using a mixer, beat butter until it is fluffy.  Add 3 cups of sugar - one cup at a time - mixing until it's completely incorporated.  Add vanilla, raspberry extract, fresh raspberries (rinsed and THOROUGHLY dried) and half and half along with the last cup of sugar and mix together, adding more half and half until the icing is the desired consistency.

I really liked the crunch in the cake, and, did I mention this buttercream is AWESOMELY AMAZING?!!  No?  Well, it is!  The first time I made this icing it turned out perfectly.  This time, however, if you look closely, you can see the swirl shape didn't hold up too well.  That's because I didn't completely dry the raspberries and it made the icing a bit watery.  I didn't want to add more sugar because I didn't want it to become too sweet, so I left it as is, learned my lesson! Now for cupcake number 2:

Chocolate Cupcakes with smashed Raspberry M&M topping iced with raspberry buttercream and Melba sauce:

These were my favorite of the two.  First, I baked the chocolate cupcakes as directed, with no M&M's added.  While they were still hot out of the oven, I topped them with some crushed M&M's:


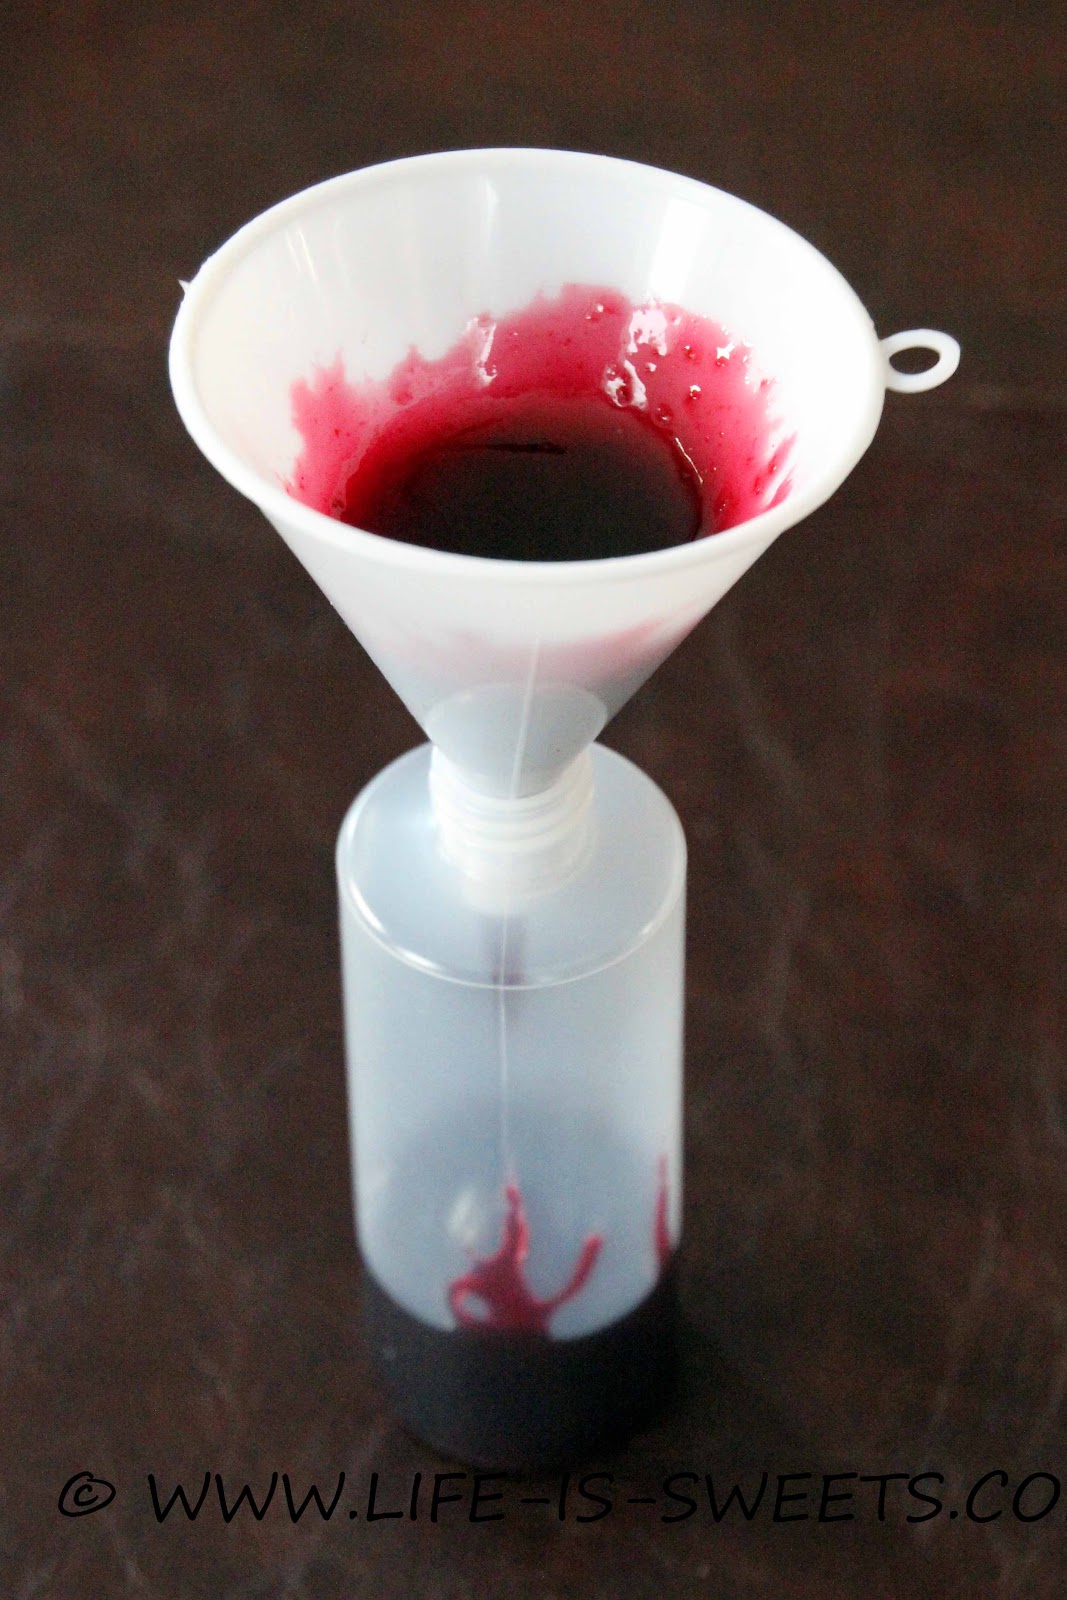
When they were completely cooled, I topped them with the same icing as above, but I did not add the fresh raspberries.  I piped the white raspberry icing with the same Wilton #1M tip in a classic swirl.  Next, I poured Raspberry Melba sauce into a squeeze bottle using a small funnel:


After I filled the bottle, I took the cupcakes out of their wrappers since adding the sauce would be messy.  (This is one cupcake I would serve with a fork and no wrapper.)  I squeezed the sauce on top of the icing in a criss cross pattern.  I think they looked great and they were SSOOO good!  As with the previous cupcake there was a nice, unexpected crunch of the M&M's and lots of great raspberry flavor.  Chocolate and raspberry together are heaven!  I will definitely make these again for dessert in the near future.

That's the end of my Candy Cupcake Series.  In two weeks I'm going to do a series of cupcakes based on favorite non-alcoholic drinks.  Next week will be carrots, bunnies, chicks and colorful eggs!  Have a great weekend.  :)


Wednesday, March 14, 2012

Shortbread Cookies - Raspberry and Almond


So, yes, I am on a bit of a shortbread cookie kick right now.  I'm like this with most things in life...can't get enough of something and then move on to the next obsession!  Meals, TV shows, songs, outfits, and now shortbread cookies.

This time, I wanted to add different extracts to my favorite shortbread recipe; the one I used for the Cherry Hearts Dipped in Chocolate.  I love it as a buttery shortbread, but I also think it's a good base for adding different flavors to change things up.  The Peanut Butter with Chocolate Chip Shortbread Cookies and Dutch Chocolate Shortbread with Peanut Butter Chips Cookies recipes are quite different from this one.  Those, as I wrote, are melt-in-your-mouth soft, crumbly cookies.  This recipe has an initial "crunch" at first bite with a soft chewy center.  I really love that combination.

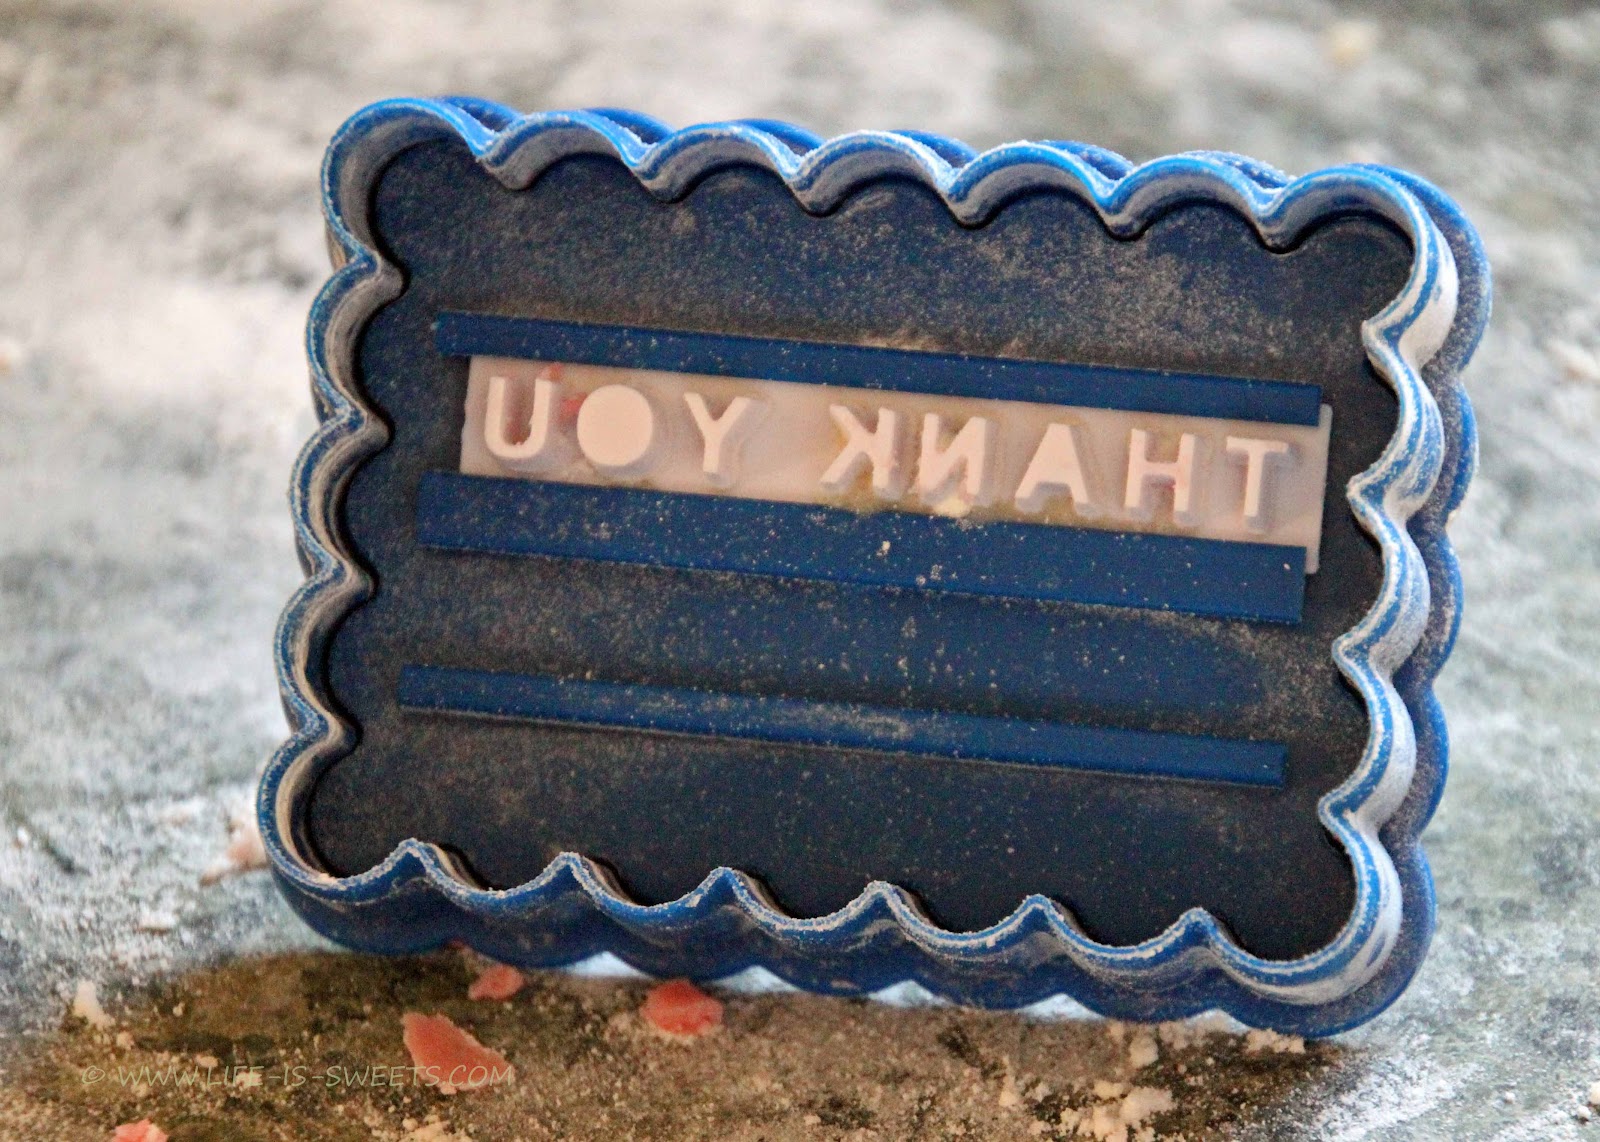
I was making these cookies as a "Thank You", which was a great opportunity to use my new cutter set from Williams-Sonoma.  There are three basic shapes and removable sayings and letters to spell out whatever you wish.  This was my first time using them:


As I was going through lots of shortbread cookie recipes trying to find what I wanted to use, I read many user comments and one thing really stuck out to me.  People seem to confuse shortbread cookies with cut-out cookie recipes.  There seems to be an expectation that using a cookie cutter with shortbread will produce the same result as sugar cookies.  This is not at all true.  I was not sure what to expect using these cutters, especially with the words imprinted, I was completely experimenting.  Shortbread cookies are very crumbly and do not hold their shape as precisely when baking as cut-outs.  They are a dryer tasting cookie, delicious in their own way, but different.  Knowing this ahead of time will help manage expectations of what you are trying to achieve.

Shortbread Cookies
Adapted slightly from Ina Garten

3/4 pound unsalted butter at room temperature
1 cup sugar, plus extra for sprinkling
1 teaspoon pure vanilla extract
1 teaspoon raspberry extract
3 1/2 cups all-purpose flour
1/4 teaspoon salt
A few drops red food coloring (to desired hue)
6 to 7 ounces very good semisweet chocolate, finely chopped


(To make the almond version, substitute 1 teaspoon almond extract for the raspberry extract and omit the food coloring)

Preheat oven to 350 degrees F

In the bowl of an electric mixer fitted with the paddle attachment, mix together butter and one cup of sugar until they are just combined.  Add the vanilla, raspberry extract and food coloring..  In a medium bowl, sift together the flour and salt and add them to the butter/sugar mixture.  Mix on low speed until the dough starts to come together.  Dump onto a surface dusted with flour and shape into a disk.  Wrap in plastic and chill for 30 minutes.

Roll the dough 1/2 inch thick and cut with chosen cutter.  Place cookies on an ungreased cookie sheet and sprinkle with sugar.  


Bake 20-25 minutes or until edges begin to brown slightly.  DO NOT OVERBAKE!!!  Allow to cool to room temperature.


When the cookies are cooled, place them on a cookie sheet lined with parchment paper.  Put 3 ounces of chocolate in a glass bowl and microwave on high for 30 seconds.  Stir with a wooden spoon.  Continue to head and stir in 30 second intervals until the chocolate is just melted.  Add the remaining chocolate and allow to sit at room temperature , stirring often, until it is completely smooth.  Stir vigorously until the chocolate is cooled and smooth and slightly cooled.  Stirring makes it glossier.


Drizzle each cookie half way with enough chocolate to coat it.


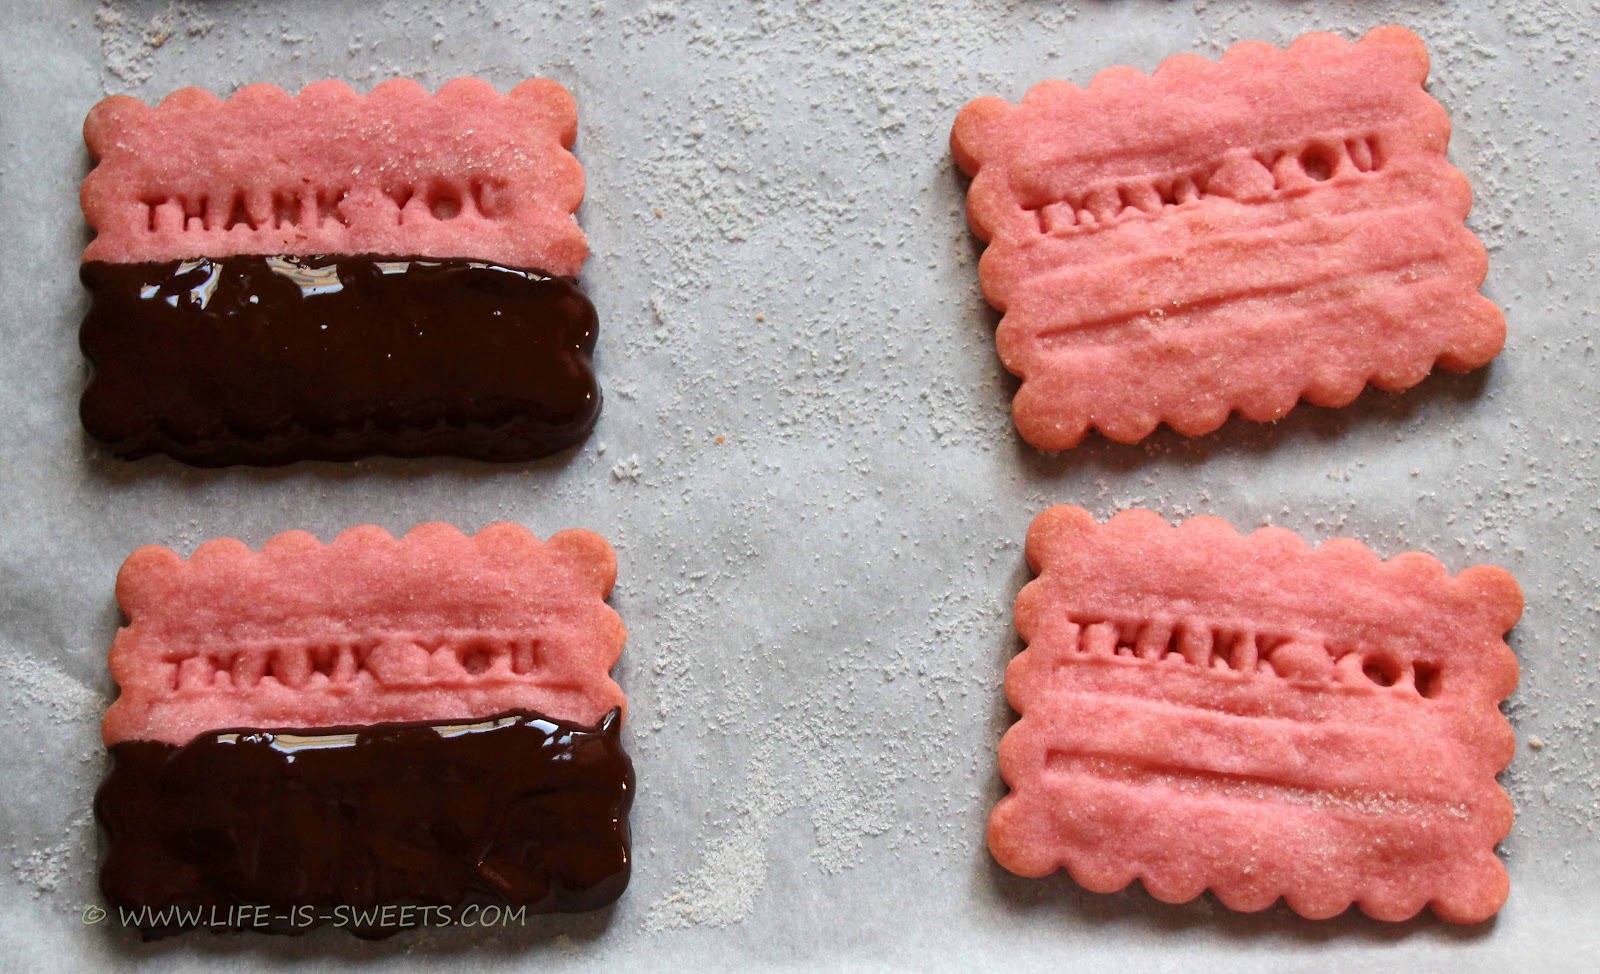
First, though these may not be the pretties cookies, they taste GOOD!  I love this recipe!!  You may note what I was talking about with the shape holding up while baking.  The letters are askew and uneven.  Fortunately, this does not affect the taste!  For this cookie experiment, the flavor was a success, the cut-outs not so much.  Next time, I will use a simple cutter with no lettering.

This will conclude my foray into shortbread cookies!  I have several orders to fill in the next few days that need my attention.  There will be cakepops, brownies, bailey's cupcakes, green velvet cupcakes, and Minnie Mouse cupcakes.  Yay!


Thursday, January 26, 2012

Fresh Raspberry Cupcakes with Raspberry Buttercream


Yum Yum Yum!  That's how will I sum up the taste of these cupcakes!  I found some raspberry extract while shopping, which, I'll be honest, I never even knew existed, and wanted to use it in a recipe immediately.  I bought some fresh raspberries and looked up a vanilla cupcake recipe on Martha Stewart and went to work.

Scratch Raspberry Vanilla Cupcakes
Adapted slightly from Martha Stewart

3 cups all-purpose flour
1 1/2 teaspoons baking powder
3/4 teaspoon salt
12 tablespoons (1 1/2 sticks) unsalted butter at room temperature
1 1/2 cups sugar
4 large eggs
1 teaspoon pure vanilla extract
1 1/2 teaspoons raspberry extract
1 1/4 cups milk
1 cup fresh raspberries

Preheat oven to 350 degrees.  Line cupcake pan with liners; set aside.  In a medium mixing bowl whisk together flour, baking powder and salt.  In a large mixing bowl cream together butter and sugar until fluffy.  Add eggs, one at a time,  mixing until incorporated.  Scrape down sides of bowl and mix in vanilla.

Add flour and milk alternately, beginning and ending with flour.  Scrape down sides of bowl.  Add whole raspberries to batter and use mixer to incorporate.  The berries will break up into pieces but will not alter the color of the batter.

Divide batter evenly among liners, filling each about 2/3 full.  


Bake until cake springs back, approximately 18-20 minutes.  After removing pan from over place on wire rack to cool for 5 minutes.  Remove cupcakes from pan and let cool completely on rack.


Oh, did my house smell SOOO good while these were baking!  I was anxious to get the cupcakes frosted so I could try one.  I knew I wanted to use buttercream icing, but wasn't sure if I wanted to make it raspberry flavored.  I figured why not, the worst that could happen was an overdose of raspberry, and I was okay with that!

Raspberry Vanilla Buttercream Icing

2 sticks of butter (I did use salted)
4 cups of confectioner's sugar, sifted
1 teaspoons vanilla extract
1 teaspoon raspberry extract
1/2 cup of fresh raspberries
3-5 tablespoons half and half

Using a mixer, beat butter until it is fluffy.  Add 3 cups of sugar - one cup at a time - mixing until it's completely incorporated.  Add vanilla, raspberry extract, fresh raspberries (rinsed and dried THOROUGHLY) and half and half along with the last cup of sugar and mix together, adding more half and half until the icing is the desired consistency.

This icing is absolute heaven!  I mean, really.  I could eat this for breakfast, lunch and dinner.  The fresh berries turned the buttercream into the lovliest shade of pink.  They elevated the taste to perfection.  I could not wait to eat one, so I used a piping bag to frost each cupcake.


Delicious.  I might like these better than the Bellini cupcakes.  It's hard for me to make that call!  The cupcake itself was a bit too dense for me, so I think I'm going to try a new vanilla cupcake recipe, but the flecks of fruit throughout were SO good!


If you love or even just like raspberries, I urge you give these a try!


I have shared this recipe on:


A Little Nosh


Raising Oranges


Miz Helen’s Country Cottage

Monday, January 23, 2012

Raspberry Brownie Bites


These are hands-down my favorite "go-to" recipe for instances I need to provide a quick treat for any occasion.  They require minimal preparation and everyone loves them!  Brownie  Bites are extremely versatile.  You can substitute raspberries with mini peanut butter cups, Hershey Kisses, M&Ms, etc. However, I think that the Dark Chocolate/Raspberry combination can't be beat!

To begin you will need a box Dark Chocolate brownie mix.  I have tried these  bites with non-Dark Chocolate mixes, and the taste isn't quite as good.  After preparing the batter as directed, use a cookie scoop to fill the cavities of a greased mini muffin pan.  Bake at 350 degrees for 18-20 minutes.  Let cool for 5 minutes before removing from pan.  Place bites on a cooling rack set over waxed paper.

While the brownies continue to cool, prepare the chocolate ganache.

Chocolate Ganache for Brownie Bites
recipe by Betty Crocker

2/3 cup whipping cream
1 cup semisweet chocolate chips

In a one quart saucepan heat whipping cream over low heat just to boiling.  Remove from heat; stir in chocolate chips until melted.  Let stand for 15 minutes or until mixture coats a spoon.  Pour 2 teaspoons of mixture over brownie bite.  Top with fresh raspberry if desired.


Really, these are the perfect sized treat and present wonderfully on a dessert table.  I've used them for just about any occasion imaginable and they are always a huge hit!  I'm sure you will love them, too.  :)


I have shared this recipe with:

Cast Party Wednesday