Showing posts with label Halloween. Show all posts

Wednesday, January 16, 2013

What? Halloween is only 9 Months Away! ;)


I've been on a bit of a hiatus.  I hadn't intended to be away for so long, but life happens, right?!  I had this Halloween Cupcake-scape in cue since last October and initially thought it was too late to post it.  But then again, why not?!

The idea came from my an order my neighbor placed for a birthday cake for her son, who was turning 6.  He requested a Halloween theme to celebrate, and we arrived at this idea instead of a traditional cake. 

Begin by baking cupcakes in the flavor of your choice.  While they are cooling, start on the chocolate trees.  You can find directions for making them here.  They cannot be easier to put together!


While the chocolate trees harden, arrange the cooled cupcakes in a random pattern close enough that they are touching.  Dye a batch (or can) of icing green to create a "grass" color.  If you would like to use homemade icing, you can find my favorite recipe here.  Using a Wilton Grass Tip #233, start piping the grass.


Now comes the fun part - using your imagination to create any type of Halloween scene you'd like!  I decided not to be too ghoulish, as this was to be for 6 year-old children.  I made some white chocolate ghosts using a ghost lollipop chocolate mold.  These, too, were super easy.  Melt white chocolate, pour them into the molds (first, I melted a bit of dark chocolate, just a small amount, and used a small brush to paint in the eyes and mouth), add the lollipop stick and place in the refrigerator to harden.  When you pop the ghosts out, you can use the lollipop stick to anchor the ghost into a cupcake.  

I also added a chocolate tree, sprinkled a few autumn leaves quins underneath the tree, placed a few sugar pumpkins around, and randomly threw on some candy skulls.  


Lastly, I added a "BOO" banner to tie it all together.


This was a really fun cup-"cake" to put together.  The birthday boy was happy and the kids loved it.  Mission accomplished!

I'm looking forward to blogging about desserts and such in the coming weeks.  I haven't been blogging, but I sure have been baking the last few months.  I'm excited to start experimenting and trying new things and hope you'll find some things of interest, too!

Happy New Year to you all, and thanks for continuing to follow Life Is Sweets!!


Sunday, October 30, 2011

Chocolatey Halloween Baked Donuts


I found THE most amazing chocolate donut recipe.  I will look no further, this one is it!  I love when a recipe is just right on the first try.  Another great thing is that it yields 6 donuts, so if you have the urge to make them you will not end up with an army of donuts that need eating!!

So, here's the recipe:

Chocolate Baked Donuts
(adapted from Handle the Heat)

Note : It may seem strange to add nutmeg to a chocolate recipe, but nutmeg is the key to a recognizable doughnut flavor. It’s fine to leave it out, but your doughnuts may taste a bit more like chocolate cupcakes.

1 cup of flour
2 tablespoons Dutch cocoa powder
1 teaspoon baking powder
1/4 teaspoon baking soda
2/3 cup sugar
1/2 teaspoon nutmeg
1/2 teaspoon fine grain salt
2 tablespoons unsalted butter
1/2 cup milk (I used 2%)
1/4 cup plain yogurt
1 teaspoon vanilla extract
1 large egg

Preheat oven to 400 degrees and lightly grease donut pan (or muffin tin).  Sift together flour, cocoa powder, baking powder and baking soda, then whisk in sugar, nutmeg and salt.  Using your fingers, add the butter working it into the dry ingredients until course crumbles are formed.  In a separate bowl, whisk together the milk, yogurt and egg.  Add the dry ingredients and stir until they are just combined.


You do not want to over mix the donuts or they will bake up dense and heavy, rather than light and fluffy.  To place donut batter into the donut pan cavities, pour the batter into a ziploc bag, cutting off one corner.  You can then squeeze the batter into the pan with minimal mess.  Fill each cavity about 1/2 to 3/4 full.


If you overfill the pan the donuts will bake up without a hole in the middle.  Bake for 8-10 minutes until the donuts spring back lightly when touched.  Place on a rack to cool slightly before adding the glaze.

Chocolate Glaze

1/4 Cup unsalted butter
4 tablespoons whole milk, warmed (I used 2%)
1/2 tablespoon light corn syrup
1 teaspoon vanilla extract
2 ounces bittersweet chocolate, chopped
1 cup confectioners sugar, sifted

Combine butter, milk, corn syrup and vanilla in a medium sauce pan over medium heat until butter is melted.  Decrease heat, blend in  chocolate, whisking until it's melted.  Turn off the heat and add powdered sugar, whisking until smooth.  Place the mixture over a bowl of hot water and dip immediately into the glaze mixture.  Allow glaze to set 30 minutes before serving.


I wanted to "Halloween-up" my donuts, so added black gel food dye into the donut batter to darken it up a bit.  I also added black dye to the chocolate glaze until it was a nice, deep, black color.  I tried dipping the first two donuts in the glaze, but they broke apart and were a mess.  For the remaining 4 I place a sheet of waxed paper underneath the cooling rack and spooned on the glaze.  This worked perfectly.  When I finished, I removed the waxed paper and was left with no mess at all.


Once glazed, I sprinkled on some orange and white ice cream sprinkles I had in my pantry.  They look delicious and taste even better!  What a great way to start off Halloween day by baking these for breakfast with your ghouls and goblins.  :)


Saturday, October 29, 2011

What, or Who is lurking in the Shadows?!


We are just a few days away from my favorite holiday - HALLOWEEN!  I love everything about it, the colors, the time of year, and, of course, the treats!  And I love breaking out my adorable Halloween measuring spoons!   :)


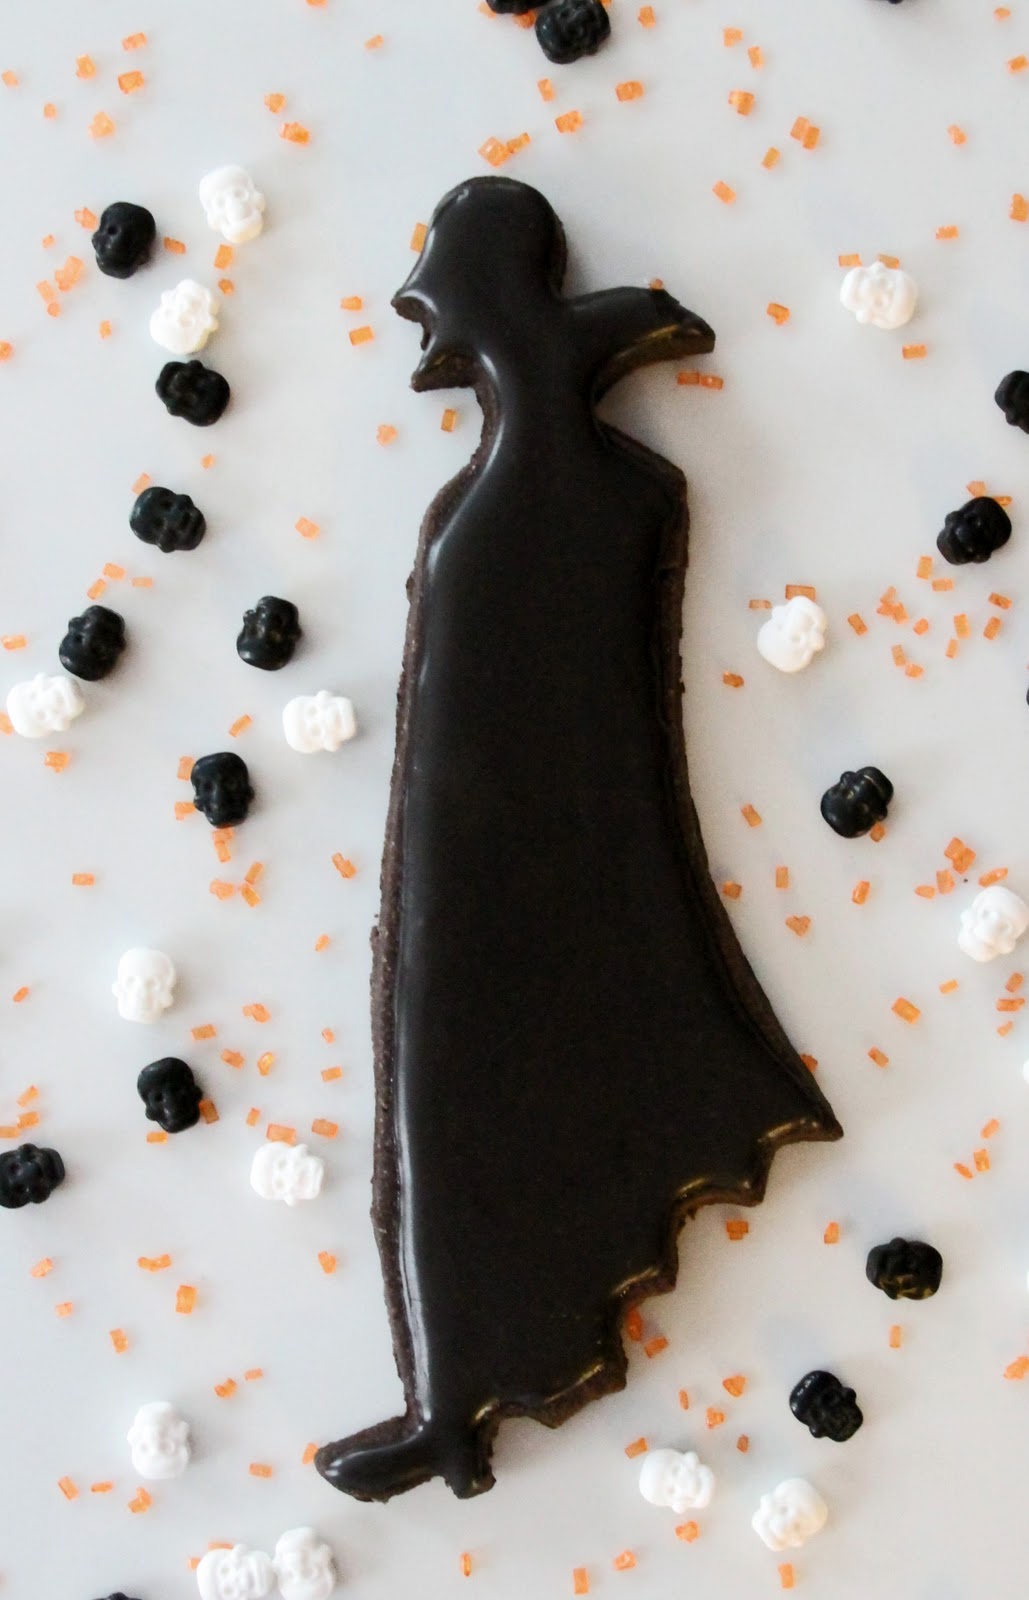
My first project is a cookie made with what is now my favorite cookie cutter ever!  I found this Nosferatu cutter at Sur La Table.  It is so creepy and a touch frightening looking, unusual for a cookie cutter.  Immediately I knew I had to have it.  This cookie did not disappoint.

I mixed up my favorite chocolate cookie dough recipe:

Chocolate Cut-Out Cookies
adapted from recipe found on Bake at 350

1 cup unsalted butter
1 cup sugar
1 egg
1 teaspoon vanilla
1/2 cup baking cocoa
1/2 teaspoon coarse salt
2 1/2 cups all-purpose flour

Preheat oven to 350 degrees. Whisk together the dry ingredients and set them aside. Cream together butter and sugar. Beat in the egg and vanilla. Combine the flour mixture a little at a time. Roll the dough onto a floured/cocoa-ed surface. Cut out desired shapes with selected cookie cutters. Freeze cut-outs on cookie sheet for 5 minutes before baking to ensure baked cookies will keep their shape. Decorate with icing as desired.


Bake the cookies for 8-10 minutes and let them cool.  I stared long and hard at the cookie for decor ideas, but in the end I decided a solid, deep black would be best.  In my opinion, there's not much more to be done here to make this cooler looking.  Besides, aren't spooky, shadowy figures what Halloween is all about?!

I mixed together sifted confectioners sugar with a touch of water until the icing was the consistency I wanted.  I was going for a thicker icing so it would not flow over the edges of the cookie.  I used a #1 tip to outline Nosferatu.  Then I filled in the middle with more icing and used a toothpick to coax it to the edges being careful not to go over the outline.  This is quite a large cutter so I worked with two cookies at a time.

What fun Halloween treats will you be making this year? 


Monday, October 3, 2011

Reese's Peanut Butter Pumpkins


Right off I'm going to say part of me wishes I didn't make these.  I have absolutely no self control around the holiday times when Reese's sells their peanut butter eggs, trees, hearts, and pumpkins.  It's a problem.  So, obviously I am taking a big risk learning how to make them in my own house.  But I did.  And they taste perfect.  And I'm sure I'm going to regret this day!

I found this recipe here and restrained myself as long as I could from giving it a try.  They are so simple you may or may not want to make them yourself.  It all depends on whether or not YOU have self control to stop at just one, or two, or....you get the idea.

Anyway, this is what you need:

Reese's Peanut Butter Pumpkins

1 cup creamy peanut butter (I used Reese's Peanut Butter)
1/4 cup melted butter
2 cups powdered sugar
1-2 tablespoons milk
1 1/2 cups of melting chocolate

Mix together the peanut butter, sugar and butter.  If the mixture is too thick, add the 1-2 tablespoons of milk.  The texture should be stiff but pliable, like Play-Doh.  Place the mixture onto a flat surface and spread evenly until is the thickness you desire.


Next, use a cookie cutter or mold your own shapes to dip into chocolate.  I did not have a small pumpkin cutter, so I used a small Christmas ornament cutter, which I then shaped into a pumpkin myself.  While I was at it, I cut out a few trees to see how they would look.


Also, I could not help but use my small Buffalo cookie cutter to make some Buffalo's.  I love representing my home!  Once you cut out your shapes (continue remolding the scraps until you have used all of the peanut butter mixture.  I also made some ball shapes to make a truffly version.), place them in the freezer for about 10-15 minutes.  Use a toothpick stuck in the side of your shape to dip them into melted chocolate.  I used Merkins melting milk chocolate wafers.  Melt them in a microwaveable bowl for 30 second intervals on Power Level 2 until all chocolate is melted smooth.


After letting the excess chocolate drip off, place the dipped shape onto waxed paper and remove the toothpick.  Dab a bit of chocolate onto the hole where the toothpick was.  I made the mistake of placing my shapes on a baking rack.  I do not advise this, as my shapes stuck to the rack and were not only difficult to remove, but also many of them tore.  The ones I placed on waxed paper had excess chocolate melted around the edges, but they came off the paper with no problem and held their shape wonderfully.


How GREAT are these??!!  And they taste so, so, so delicious!  Really, in a blindfolded taste test I would not be able to tell the difference between these and the real thing.  See, this is a problem.  Give them a try yourself, you won't regret it.  Or, you might!