Showing posts with label cake. Show all posts

Friday, January 18, 2013

A Tiramisu Triumph!


I'm excited to share this recipe with you.  Of all the desserts, cupcakes, and sweet treats I've made to date, these cupcakes absolutely received the most rave reviews.  They are both pretty and pretty easy to make!  If you like tiramisu, I cannot  recommend these enough.

To begin, mix up your favorite yellow cake recipe and bake it into cupcakes.


As they are cooling, make a cup of coffee.  Any flavor you like will do just fine.


Next, using a skewer, poke holes into the cupcakes.  Be sure to poke several holes so the coffee absorbs.  You can either use a pastry brush to apply the coffee to the cupcakes or a spoon to pour it on.  I found using a spoon worked better to achieve the sponge-soaked cake effect of tiramisu.  I poured a teaspoon sized spoon of coffee onto each cupcake, one at a time, and repeated the process until the cup of coffee was gone.  


This photo shows the three steps from bottom to top:
1.  Bake cupcakes
2.  Poke holes with skewer
3.  Apply coffee with pastry bush or spoon


While the cupcakes sit soaking up the coffee, prepare the icing (which is soooo delicious!).  One of the distinctive flavors of tiramisu is mascarpone cheese, a smooth and soft buttery cream mixture with a sweet, light flavor.  In the cupcake version it's used in the icing.  You can find it in the cheese section at most grocery stores.


Mascarpone Cheese Icing

1 cup heavy whipping cream
1 8 oz. package of mascarpone cheese
1/2 cup confectioners sugar

Using an electric mixer, beat heavy cream until it forms stiff peaks.  (To see the progression of stiffness as you beat the cream, click here for photos at one minute intervals).


In a separate bowl, beat together mascarpone cheese and sugar.  Once the mixture if fully creamed together, add the whipped cream in three increments, beating until completely incorporated at each interval.  The final product of icing will look like this:


To ice the cupcakes, I used a piping bag with the end snipped off.


After each cupcake is piled high with fluffy icing, dust the tops with cocoa powder.


Lastly, add some bittersweet chocolate shavings for garnish (if desired).


And there you have it! 


You can see the coffee soaked cake deliciousness after just one bite.  


Tiramisu is my Husband's favorite dessert so I'll be baking him these for Valentine's Day.  I hope you have an opportunity to make and enjoy them, too!


Wednesday, April 18, 2012

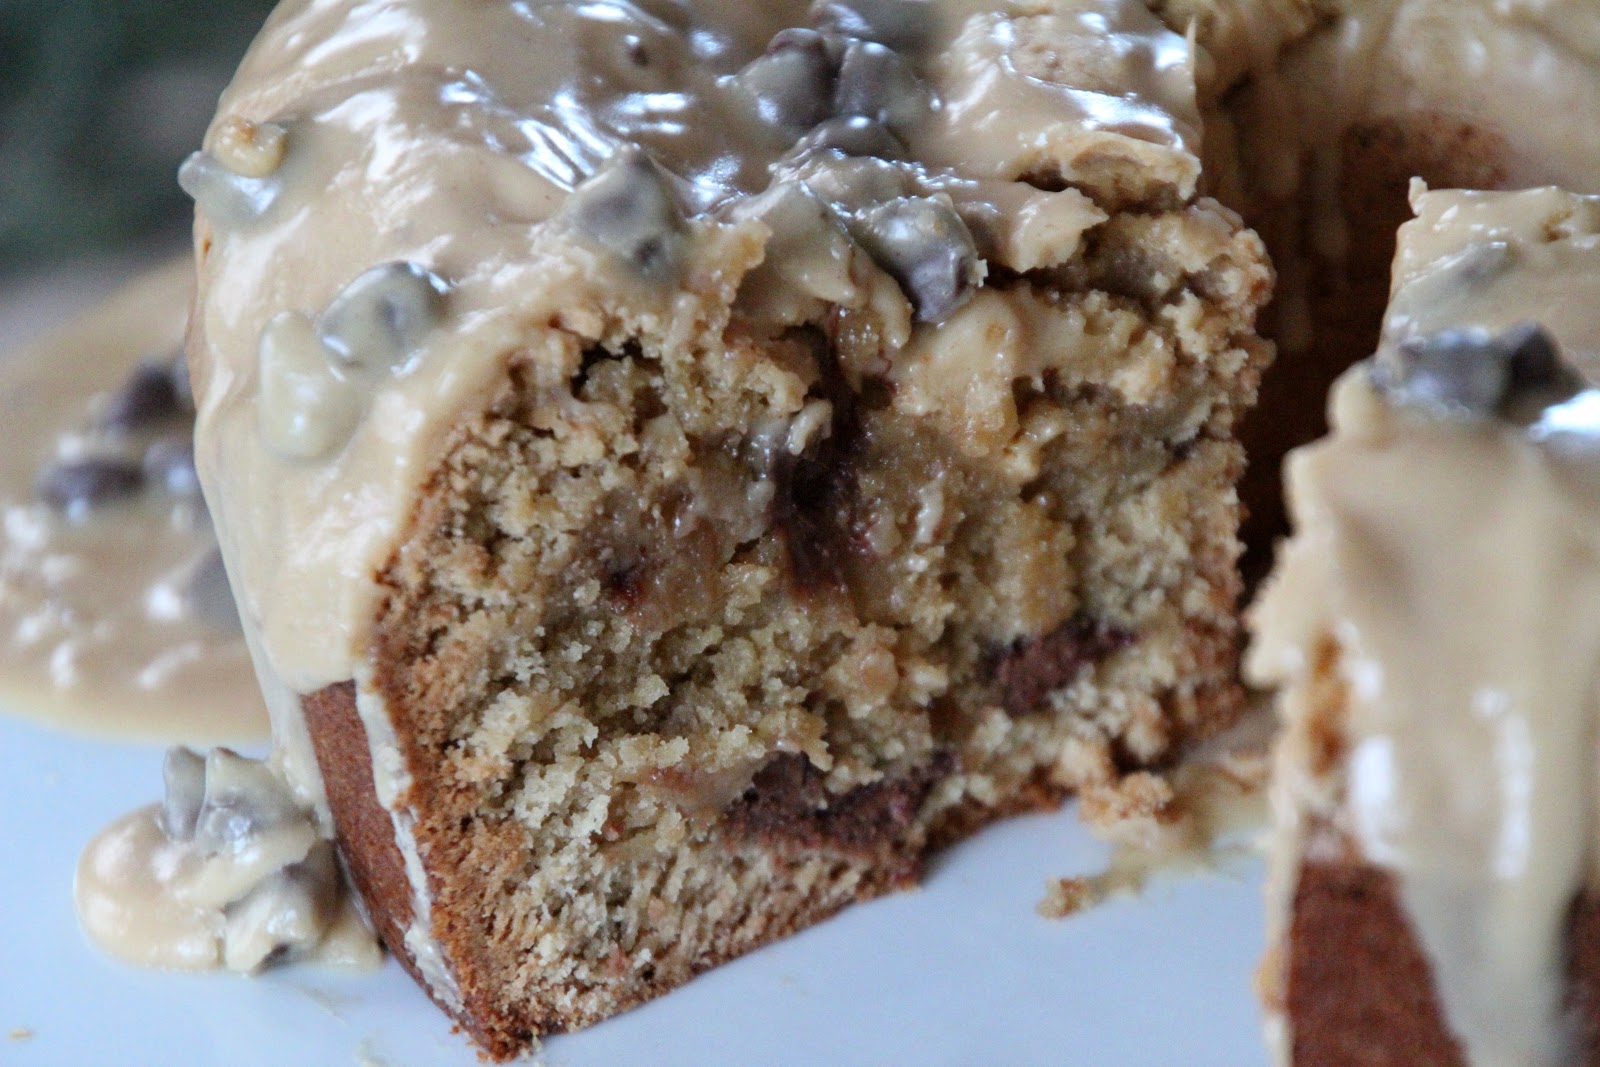
Peanut Butter Chocolate - Chip Pound Cake with Peanut Butter Glaze


Pay attention folks, this is one recipe you should NOT miss!  I expected it to be delicious, but WOW, it's amazing!!  It's also totally not good for you, but you can pretend I didn't write that.

Okay, so I pinned this on Pinterest ages ago from Recipe Girl and I finally got around to making it.  I feel like I was in a cupcake rut and wanted to try something different.  I picked the right recipe with this one!!

I'm just going to get to it so you can start baking this ASAP, but it's going to be hard for me because I sent it all to work with my Husband so I wouldn't eat any more.  Yeah, guess what I've been craving all day!!

Peanut Butter - Chocolate Chip Pound Cake with Peanut Butter Glaze
Recipe by Recipe Girl

For the Cake:
3 cups all-purpose flour
1 teaspoon baking powder
1/2 teaspoon salt
1 cup creamy peanut butter (Recipe Girl advises against natural)
1/2 cup butter, at room temperature
3 cups granulated white sugar
6 large eggs
2 teaspoons vanilla extract
1 1/2 cups milk chocolate chips


For the Glaze:
1 1/2 cups confectioners sugar
1/4 cup milk
1/4 cup creamy peanut butter
1/2 teaspoon vanilla extract
1/4 cup milk chocolate chips for garnish


To begin, preheat oven to 325 degrees.  Spray a tube pan thoroughly with non-stick cooking spray, set aside.  Next, whisk together flour, baking powder and salt in a medium bowl.  Set aside.  In a large bowl, using an electric mixer, beat together peanut butter and butter until creamy.  Add granulated sugar and beat for an additional 5 minutes.


Add eggs and vanilla, beat until combined.  The batter will be thin.


Add the flour in increments (I did 4) to the batter.  It will thicken very quickly:


Pour the batter into the greased tube pan and tap it against the counter to make sure any air bubbles will pop.


Bake for 1 hour and 20 minutes.  Test with a wooden skewer to make sure it is fully baked (stick skewer into middle of the cake and if it comes out clean the cake is done.).  Remove cake from oven and let it cool in the pan for 20 minutes.  After removing the cake from the pan, let it cool completely before adding the glaze.


To make the glaze, whisk together the confectioner's sugar, peanut butter, milk and vanila extract until its combined.  The glaze needs to be thin enough to drizzle on the cake, so if it's too thick add a bit of milk a little at a time until desired consistency is reached.  Once the cake is cooled and glaze is whisked up, drizzle!  Garnish with additional chocolate chips.


I totally want this cake for dinner.  I'm so glad I sent it away, but not-so-secretly wish I saved myself a slice!  Anyway, a word of caution when making this cake.  I had to make it twice because the first one did not bake through all the way.  I removed the first attempt from the pan and left for an appointment while it finished cooling.  I noticed, when I returned, that it sank.  I ignored it and added the glaze and after it set I cut a nice slice for myself.  That's when I noticed the ring of uncooked dough all around my cake:


I used toothpick to check the cake and it came out clean, but I believe a toothpick is not long enough to give an accurate result.  The second attempt I used a skewer and after 1 hour 20 minutes it was not done, so I baked it for an additional 15 minutes and it was perfectly done.

But when I cut into the first cake, I'm not going to lie, I was devastated.  I wanted to eat a slice so badly I did the only thing I could do...I made it again.  So.  Worth.  It.

Now, if you like super dense, peanut buttery, chocolate accented, glazey goodness this cake is for you and I guarantee you will love it!!

Monday, September 26, 2011

Ice Cream Cones That Won't Melt In Your Hands!


I had some leftover cake pop mixture left over from last week and wanted to find something to do with it.  Of course,  I turned to Bakerella and found these amazing ice cream cone cake truffles.  I could not wait to give them a try myself!  Certainly they did not turn out nearly as perfect, but, as the title clearly states, I am a beginner and proud of my first attempt!

To start, you need some cake truffle mixture.  Click here for instructions to assemble it.  Next, find a box top  or something similar for a makeshift cone holder.  I used a candy box.  Taking a knife, I cut "X" shapes to set the cones into after dipping so the chocolate could set.


It is best to prepare this before assembling the cones so you are not stuck when you begin dipping.  Now, roll the cake mixture into balls and press into the cones.  Be somewhat firm so the balls will not fall out while dipping them into the chocolate.  Place them in the refrigerator for an hour or in the freezer for 10 minutes or so.


A few minutes before your pops have chilled and are ready to be dipped, begin melting the chocolate.  I used Wilton melting chocolate, which can be purchased at craft stores.  I heated them in the microwave for 30 second intervals on power level 2.  Repeat until the chocolate is completely melted and smooth.


Next, the dipping.  Coat the cake with chocolate and don't worry about imperfections, a bit of a rough texture creates more of an ice cream scoop effect and the drips look completely natural for ice cream.


I had to dip the white chocolate cones twice, because the chocolate cake showed through the coating.  I also made some pink ice cream cones, but I didn't like those as much.


Once the "ice cream" coating dried completely, I melted a small amount of chocolate to make "hot fudge" for the cones.  I melted a bit of red to make the cherries.  You can embellish the cones with sprinkles or jimmies, anything that suits you!

This is a more forgiving process than actual cake pops, since drips and drops actually work in the design, so you might want to give them try!


Summer may be over, but these ice cream cones will be a great treat all year 'round!  Enjoy.